Saturday, May 6, 2017
How to Password Protect your Windows 7
How to Password Protect your Windows 7
Follow the steps below to create a password for your Windows 7 User account:
Here’s How:
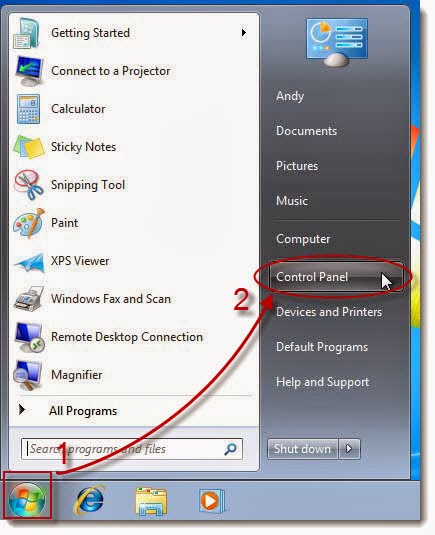
1. Click on ‘Start‘ and then ‘Control Panel‘.

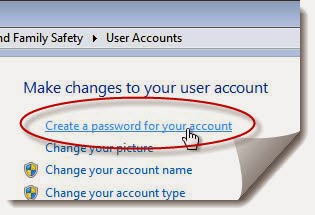
2. Click on the ‘User Accounts and Family Safety’ link.


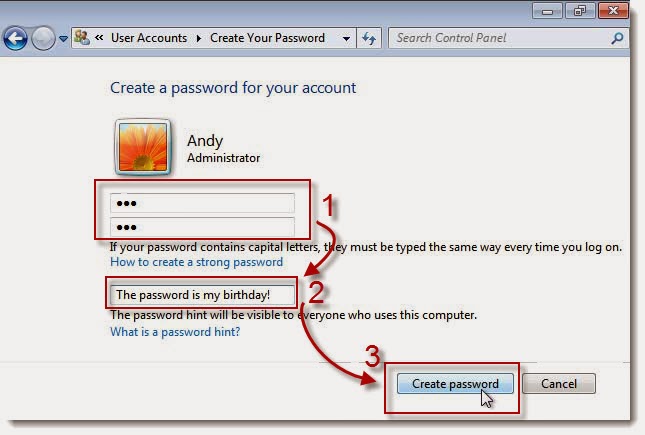
5. In the first two asterisk text boxes, enter the password you want to start using. Entering the password twice helps to make sure that you typed your new logon password correctly.
In this example I use my birthday as my logon password. But I advise you not to use your birthday as a new password because it is easy to guess.

6. In the final text box, you’re asked to Type a password hint. This step is optional but I highly recommend that you use it. If you try logging in to Windows 7 but enter the wrong password, this hint will pop up, hopefully jogging your memory.
7. Click the ‘Create password’ button to confirm your new password.
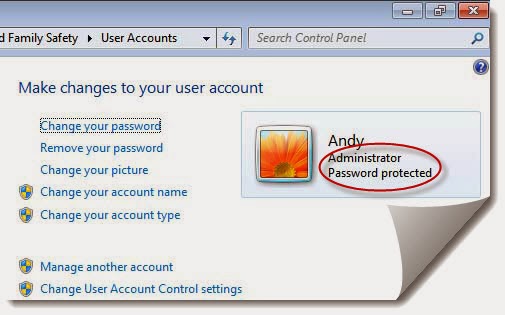
8. After creating a new password, you will be returned to the User Accounts window. Now you can see the user account ‘Andy’ has been password protected

.9. Now that your Windows 7 account has a password setup, you must use this password to log on to Windows 7 from this point forward.
Go to link Download
Subscribe to:
Post Comments (Atom)
No comments:
Post a Comment