Showing posts with label own. Show all posts
Showing posts with label own. Show all posts
Wednesday, March 29, 2017
How to create your own Email id associated with your Own domain
How to create your own Email id associated with your Own domain
Hi friends,
Welcome back,This is Nasir with Web learning topics again.Today we are going to learn how to create our own Email account associated with your own domain like nasir@burywire.com.
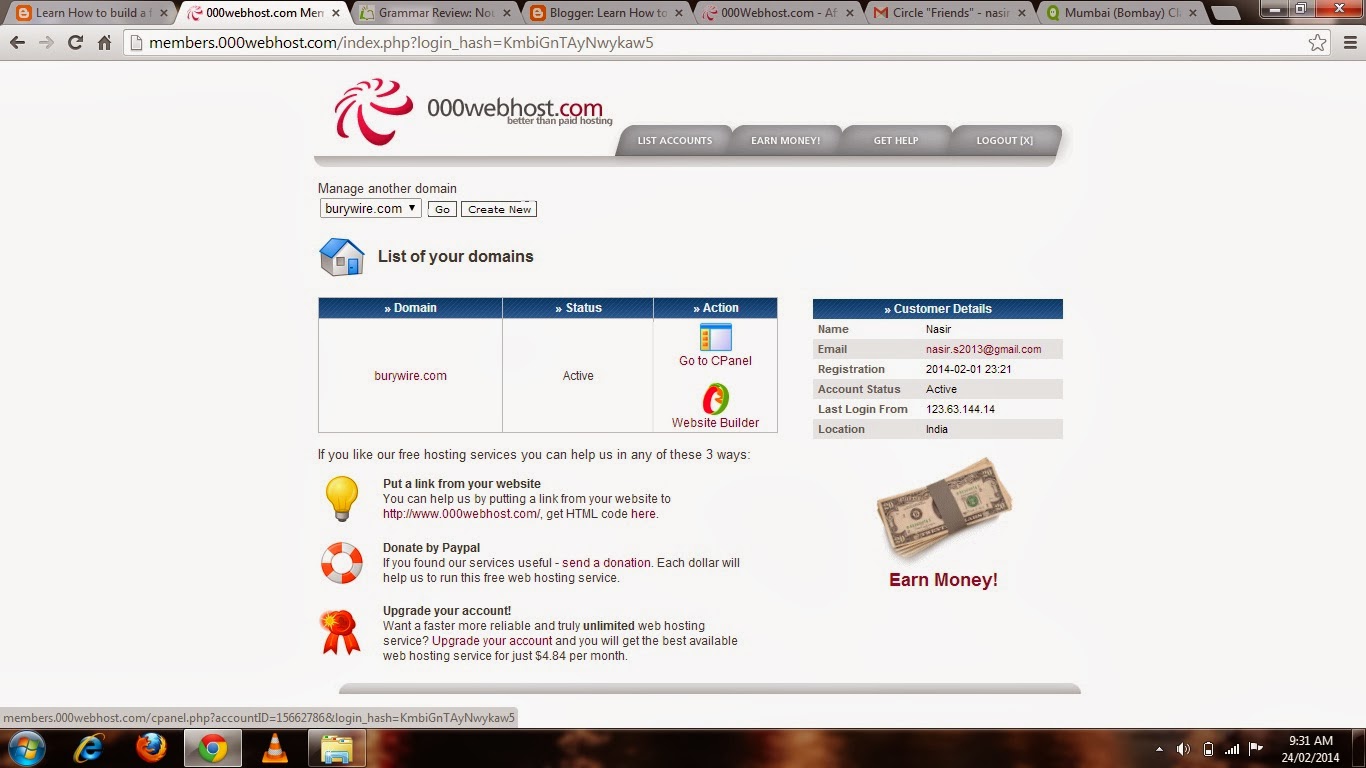
creating your Email account with your domain is very simple.So you need to first login to administrative members area of your hosting provider.In my case it will be 000webhost.com.After logging in there you go to the C panel of the domain you want to create Email account from.Look at the Picture 3-(a)below.
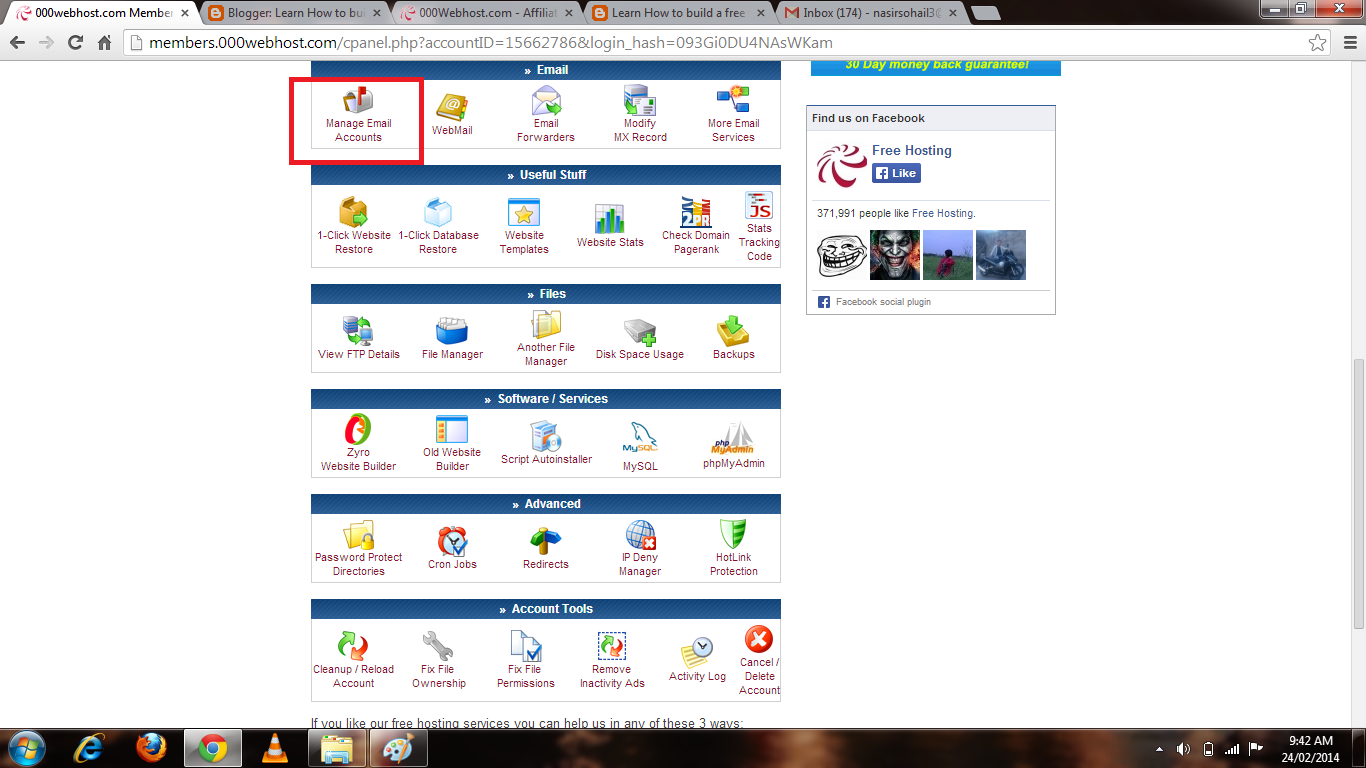
then click on the link Go to CPanel as shown in the above picture 3-(a).You will then be redirected to a handful of useful administrative stuff.Go to the Email section and click on the link Manage email as shown in picture 3-(b).
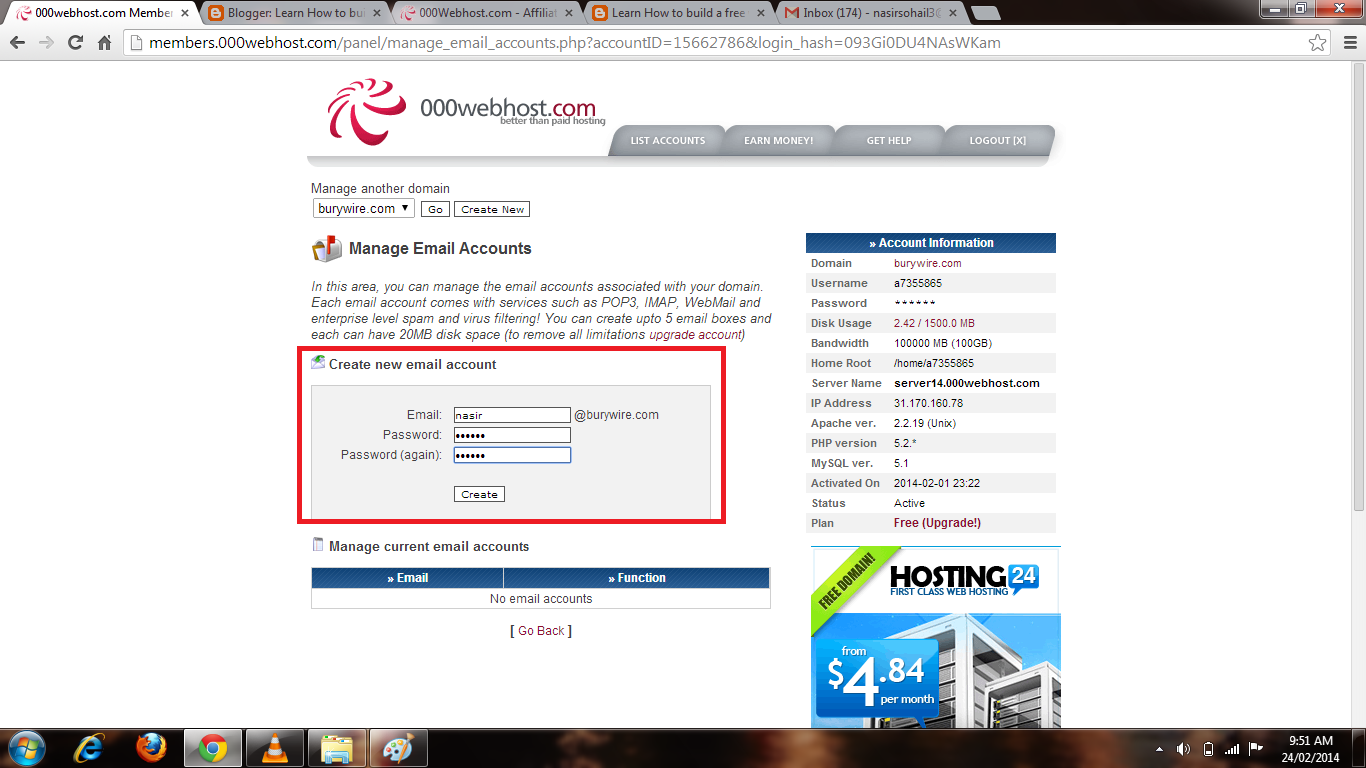
After clicking on manage email account it will ask you to type a new Email and then password and confirm the password.and then click create and it will create the email account as information provided.As shown in the below pictures 3-(c) and 3-(d) where I have just created two email account for myself and my beautiful wife.
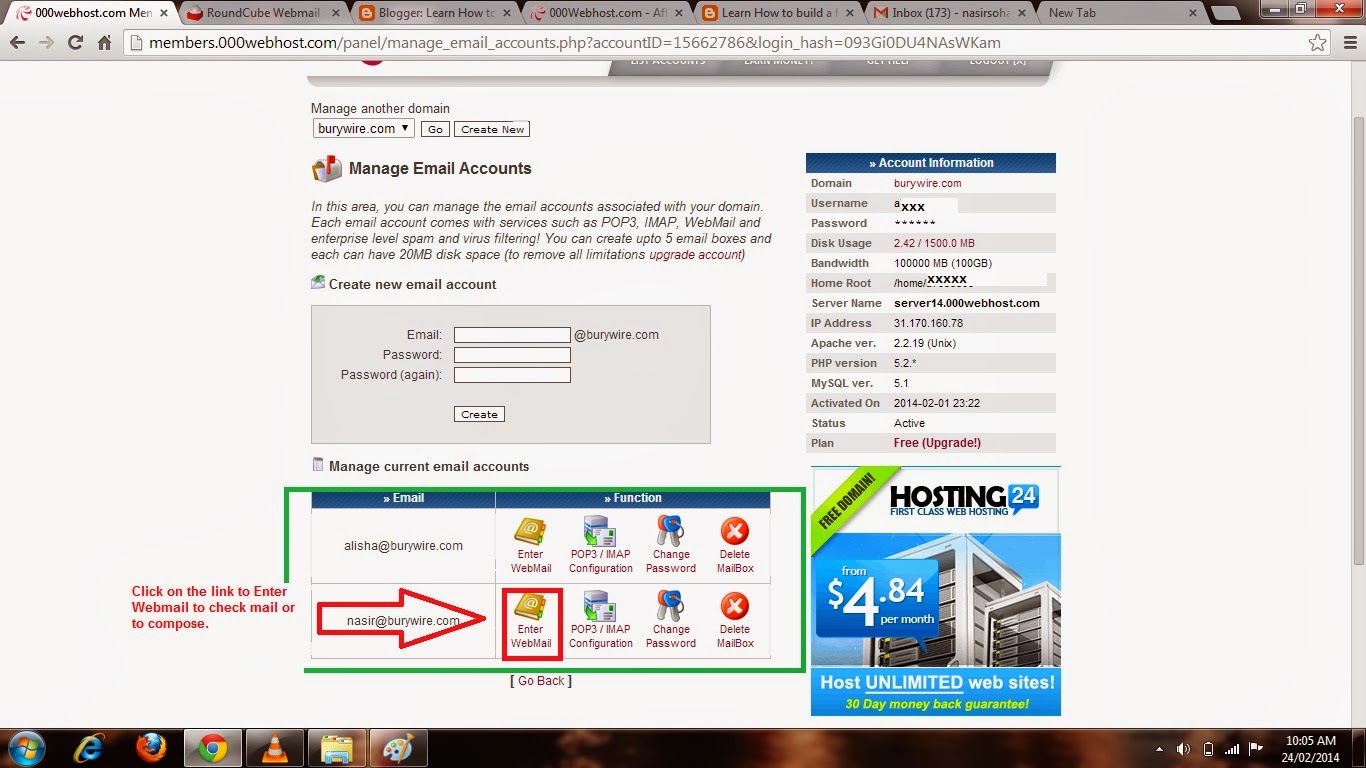
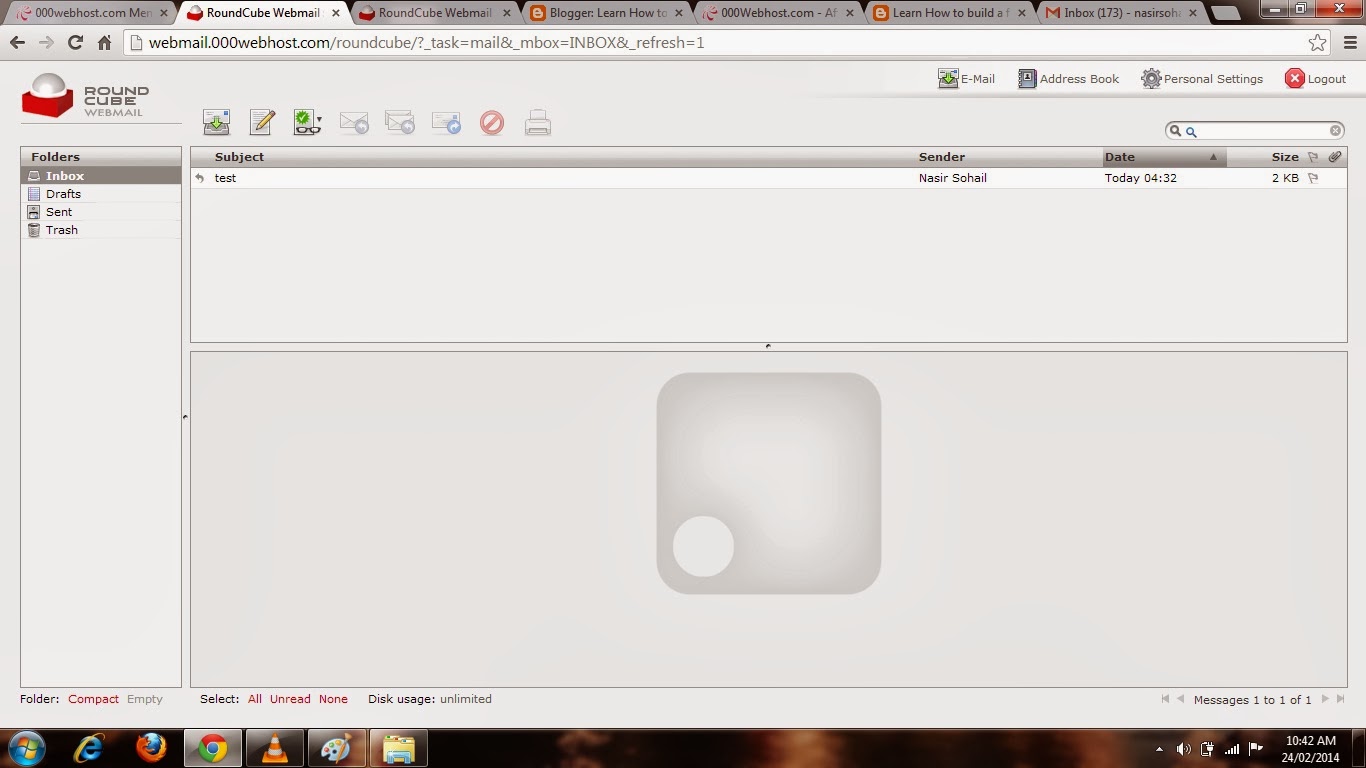
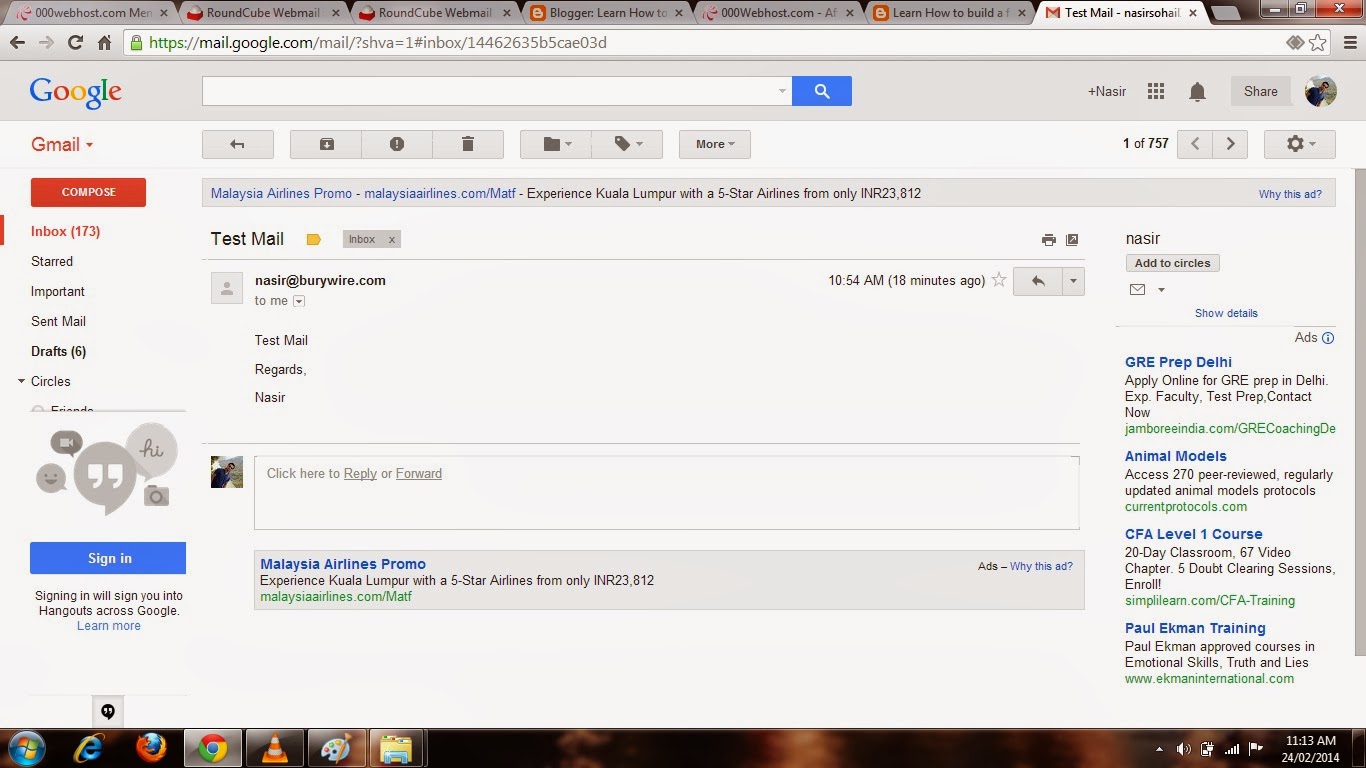
Now you have successfully created the email account and now is the time to Test it so click on the Enter web mail option as shown in the picture 3-(d).And then you will be redirected to the web mail client as shown in the picture 3-(e) where I have sent a test mail to my Gmail account and and it worked as shown in picture 3-(f).

Finally we have created the New Email account and Tested it.And its working Fine.In my next Post I am gonna talk over how to configure your business E-mail on outlook/ Outlook Express or on your Android Phone.So Stay connected keep visiting.
Enjoy Emailing... :-)
Nasir
Welcome back,This is Nasir with Web learning topics again.Today we are going to learn how to create our own Email account associated with your own domain like nasir@burywire.com.
creating your Email account with your domain is very simple.So you need to first login to administrative members area of your hosting provider.In my case it will be 000webhost.com.After logging in there you go to the C panel of the domain you want to create Email account from.Look at the Picture 3-(a)below.
 |
| 3-(a) |
then click on the link Go to CPanel as shown in the above picture 3-(a).You will then be redirected to a handful of useful administrative stuff.Go to the Email section and click on the link Manage email as shown in picture 3-(b).
 |
| 3-(b) |
 |
| 3-(c) |
 |
| 3-(d) |
Now you have successfully created the email account and now is the time to Test it so click on the Enter web mail option as shown in the picture 3-(d).And then you will be redirected to the web mail client as shown in the picture 3-(e) where I have sent a test mail to my Gmail account and and it worked as shown in picture 3-(f).
 |
| 3-(e) |
 |
| 3-(f) |
 |
| 3-(g) |
Finally we have created the New Email account and Tested it.And its working Fine.In my next Post I am gonna talk over how to configure your business E-mail on outlook/ Outlook Express or on your Android Phone.So Stay connected keep visiting.
Enjoy Emailing... :-)
Nasir
Go to link Download
Sunday, October 30, 2016
How to make your own screensaver
How to make your own screensaver
Free computer tip on how to make your own screensaver
You can put your own digital photos as a screensaver, First of all you need to create a slide show presentation for use as a screen saver.
HOW TO MAKE A SLIDE SHOW
- Right-click an empty spot on your desktop and then click Properties.
- Click the Screensaver tab.
- In the Screen saver list, click My Pictures Slide show.
- click on the settings button and click on browse to locate your pictures
- In the settings you can make Settings to make any adjustments, such as how often the pictures should change, what size they should be, and whether youll use transition effects between pictures, and then click OK.

Now your screen saver is a random display of the pictures taken from your located folder.
Go to link Download
Subscribe to:
Comments (Atom)