Showing posts with label bios. Show all posts
Showing posts with label bios. Show all posts
Thursday, May 4, 2017
How to Reset Your BIOS
How to Reset Your BIOS
BEST GREENHOUSES FOR GROOVING VEGETABLES
? ? 1(360)241-1624 ?

? ? 360organic.us ?
DURABLE! AFFORDABLE! ALUMINUM + UV POLYCARBONATE

Have you recently made a change to your computers hardware and need to reset your BIOS? Are you locked out of a computer that you purchased secondhand because of an unknown BIOS password? If so, youll need to reset your BIOS to factory settings. Depending on what you have access to, you can reset the BIOS from within the BIOS menu itself, reset the jumper on your motherboard, or remove and reinsert the CMOS battery that powers the BIOS memory.
Method 1 of 3: Resetting from Within BIOS
Access your BIOS. Turn on your computer and press the key on your keyboard to enter the BIOS. This is typically the Del (delete) key. Pre-built systems from major manufacturers may use a function key such as F1, F2, or F10.
If you are using Windows 8 with a UEFI motherboard, you may not have access to a traditional BIOS screen and instead will need to use the Advanced Boot menu. See Step 4 of this guide for more details.
If you cannot access your BIOS because you are locked out with a password or it has been corrupted, use one of the following methods following this section.
Find the factory reset option. The location and wording of this option varies for every different BIOS. It will typically be called "Reset to Default", "Factory Default", "Setup Defaults", or something similar. It may be located in one of the tabs or it may be an option listed near the navigation buttons.
Select the option or press the button to load your factory defaults.
If your BIOS does not have this option, use one of the following methods following this section.

Save your changes and confirm your selection if necessary. This will often be combined with the process of exiting a BIOS. Your computer will automatically reboot. If you need to change your BIOS settings once your BIOS resets, you may need to reboot your computer again and enter the BIOS to change them.
Method 2 of 3: Resetting the Jumper
Open your case. You will need to be able to access the motherboard of your computer. be very careful when working on the inside of your computer, as electrostatic discharge can easily destroy sensitive components. Make sure that you are properly grounded before working inside the computer.
Find the CMOS jumper. Locate the three-pin jumper on your motherboard that controls the BIOS. It will usually found near the CMOS battery. The jumper will be covering two of the three pins.
The jumper may be labeled CLEAR, CLR, CLEAR CMOS, PSSWRD, or a variety of other labels. Refer to your motherboards documentation to find the correct jumper.
Move the jumper to the other two pins. For example, if the jumper is covering the first and second pins, move it so that it is covering the second and third pins. Be sure to pull the jumper straight up to remove it so that you dont bend the pins.
Press your power button. Press and hold the power button on your computer for about 10-15 seconds (nothing should happen because the power is turned off). This will discharge any remaining power stored in the capacitors. This will make the BIOS reset.
Return the jumper to its default position. Put the jumper back on the pins that it was originally on. This will allow you to access your BIOS when you start your computer up. Close up the case when you are finished.
Turn the power supply back on. Move the rocker-style switch at the back of your PC to the ON (I) position. If you unplugged the computer from the wall, plug it back in.
Power on your PC. Press the front Power button. You will need to enter your BIOS and reconfigure all of the settings, including the time, date, and boot order.
Method 3 of 3: Removing the CMOS Battery.
Power down your computer. Shut down your computer from within the operating system. Locate a rocker-style switch at the back of your PC (if applicable), and switch it from the ON position (I) to the OFF position (O). If there is no switch, unplug the computer from the outlet.
Open your case. You will need to be able to access the motherboard of your computer. be very careful when working on the inside of your computer, as electrostatic discharge can easily destroy sensitive components. Make sure that you are properly grounded before working inside the computer.
For many laptops, you can access the CMOS battery from a removable panel on the bottom of the laptop. If there is no panel available, you will most likely need to disassemble the laptop to access it.
Remove the CMOS battery. The battery is typically located near your PCI slots, but may be in different locations depending on the manufacturer of your motherboard. It may be hidden by expansion cards and cables. The battery is usually a standard 3V, round, flat watch battery (CR2032).
Press your power button. Press and hold the power button on your computer for about 10-15 seconds (nothing should happen because the power is turned off). This will discharge any remaining power stored in the capacitors. By discharging the power, the CMOS memory will reset, thereby resetting your BIOS.
Reinsert the CMOS battery. Carefully reinsert the CMOS battery back into its housing. Make sure that you have put the battery in the right direction. The slightly smaller side should be facing down.
Close your case back up after reinserting the battery.
Turn the power supply back on. Move the rocker-style switch at the back of your PC to the ON (I) position. If you unplugged the computer from the wall, plug it back in.
Power on your PC. Press the front Power button. You will need to enter your BIOS and reconfigure all of the settings, including the time, date, and boot order.
Durable Greenhouses made from Polycarbonate UV Protected material and Aluminum

ALSO PLEASE VISIT THIS VIDEOS AND SEE IF YOU FIND SOMETHING NEED:
Windows Registry Tools can be downloaded here:
How to kip your PC Private by deleting DATA Permanently
http://askpctech.blogspot.com/2016/03/kip-your-pc-privat.html
This tutorial is made up on request several users, is well is fallowing video:
1)How to Delete Paint Recent Pictures from List in Windows 7
2)Win 7– Fix for “Safely Remove Hardware and Eject Media” not working How To
3)Windows 10 How to Fix Black Screen After Booting
4)How To Remove Windows 10 Upgrade Notification On Windows 7 And Windows 8
5)How to Delete Face book Page Permanently - 2015
6)How to Uninstall Windows 10 and Downgrade to Windows 7 or 8.1
7)detected: not-a-virus:remoteadmin.win32
8)How to change pictures into icons for folders
9)Speed up your PC Disable System Restore on SSD
10)Speed up your PC Disable Scheduled De-fragmentation SSD
11)2015 Black screen of DEATH Windows 7 & 8 - with cursor at start-up SOLVED
12)Upon start up only wallpaper shows FIX
13)Here is video on Windows 7 & 8 - Black screen with cursor at start-up FIX
You can also open Task Manager by pressing Ctrl+Shift+Esc.
14) I bought a windows 7 PC but it Look alike old PC FIX:
15) Windows 7 & 8 - Black screen with cursor at start-up FIX:
16) How To Fix Minecraft OpenGL Error Windows 7 xp vista 720p :
17) removing bars using regscanner regedit & file shredder 720p:
18) How to Recover windows Explorer from error 2014 720p
19) HOW TO Save on battery online
20) Windows 7 & 8 - Black screen with cursor at start-up FIX
Upon start up only wallpaper shows no icons
CTL+ALT+DEL then click file and new task. then type explorer.exe and press ok
Best Greenhouse system 2015
Go to link Download
Thursday, January 12, 2017
How to Mod your Laptop VGA BIOS
How to Mod your Laptop VGA BIOS
Basically there are 2 locations where the VGA BIOS in laptops.
Some OEMS embed the VGA BIOS in the EFI/BIOS in your laptops,
other OEMs have a separate VGA BIOS firmware on the VGA Card itself.
TYPE 1
As a general rule laptops with discrete MXM board modules like the (picture below) has
the VGA BIOS as a separate piece of code located on the module itself.

TYPE II
For OEM Boards with a GPU embedded on the Mainboard itself the VGA BIOS usually exist as a chunk of Code inside the BIOS of the Mainboard itself.
(Picture below shows the GPU on the top left corner on the mainboard covered by the black plastic)

Nowadays more and more OEMs are using TYPE II method of integration because
1) They can make the laptop more compact and light because separate MXM modules increase the thickness of the laptop.
2) It is cheaper to integrate everything on the mainboard using BGA soldering rather than have PCI-E connectors.
This article talks about modifying Type II VGA BIOS only.
First you have to identify the Type of Firmware the laptop uses, this is depends on the BIOS Vendor used by the OEM. An OEM can use a different BIOS vendor for different models.
The most prominent BIOS vendors are: Insyde, AMI, Phoenix, AWARD and Intel.
On the website mydigitallife you can find many tools coded by the members for BIOS disassembly.
We are going to use their tools to dissemble the VGA Module from the BIOS.
In this example, the Aspire 4740G uses the Insyde BIOS so download the PhoenixTool which is capable of dissembling Phoenix, Insyde, Dell and other EFI BIOS.
After downloading the PhoenixTool we decompress the PhoenixTool contents to a new folder.

We extract the PhoenixTool to a folder called "NEW". The main program is called PhoenixTool.exe
After decompressing the disssembly Tool we proceed to download the EFI/BIOS from the OEM website and decompress it as well..

From Above we can see the Complete BIOS Firmware is called NALG0x64.fd.
BIOS usually uses file extension such as BIN, ROM, BIO, WPH, FD and many more. Different BIOS Vendor usually use a different identifier.

When we use the PhoenixTool.exe to open the NALG0x64.fd file, the tool also display the emergency Insyde Recovery Filename.

After the modules have been dissembled you should see the screen above. The modules have been dissembled in a newly created folder called "DUMP" where the original NALG0x64.fd is located.

The Red Box shows the VGA BIOS module. The VGA BIOS module is usually a 70-60KB file, to confirm if it is the VGA Module, you open it with a dissembler and check the content, you should see Nvidia text reference in the binary.

The dissembly of the file shows a lot of Nvidia Text Reference to further confirm if it is the exact module you want you should Google the SKU Code in the example above it is "GT218" which references to G310M Nvidia GPU.
Some laptop BIOS has more than 1 VGA BIOS because 1 Model can have many variations of Different Nvidia SKU GPUs.A good example would be the Acer Aspire 4741G.

For ATi you would probably use Radeon BIOS Editor (RBE).
As you can see the original BIOS has the P3 state which is the default state (the lowest performance state) set at a voltage is 0.85V that is why when using HWMonitor you will never see the voltage drop below 0.85.
The lowest performance state can however use a lower voltage of 0.80V.

So we set the P3 State to 0.8V and Apply. Save the Modified VGA BIOS and exit.

Using EzH20, a Insyde BIOS Editor we open the original NALG0x64.fd file.

Select Components -> Replace Module. Each Insyde Module has a Unique GUID identifier.
8 Character - 4 Character - 4 Character - 4 Character - 12 Character
The Module we seek has the identifier "AC1E1B97-69C4-475D-8471-0F3893802F96"

Under "Module to Load" browse to the modified VGA BIOS.

Under "Change ROM GUID" enter the original identifier: "AC1E1B97-69C4-475D-8471-0F3893802F96"
Then Patch the Firmware.

Finally Save the Modified Firmware and flash it with the Insyde flashit Tool while replacing the original NALG0x64.fd with the modified NALG0x64.fd.
Go to link Download
Saturday, November 12, 2016
How to enter the BIOS or CMOS setup
How to enter the BIOS or CMOS setup
BEST GREENHOUSES FOR GROOVING VEGETABLES
? ? 1(360)241-1624 ?
? ? 360organic.us ?
DURABLE! AFFORDABLE! ALUMINUM + UV POLYCARBONATE
Important 2015:
Speed up your PC Disable System Restore on SSD
How to enter the BIOS or CMOS setup
Because of the wide variety of computer and BIOS manufacturers over the evolution of computers, there are numerous ways to enter the BIOS or CMOS Setup. Below is a listing of the majority of these methods as well as other recommendations for entering the BIOS setup.
New computers
Computers that have been manufactured in the last few years allow you to enter the CMOS by pressing one of the below five keys during the boot. Usually its one of the first two.
- F1
- F2
- DEL
- ESC
- F10
* F10 is also often used for the boot menu. If F10 is the boot menu your computer is likely F2 to enter setup.
A user will know when to press this key when they see a message similar to the example below as the computer is booting. Some older computers may also display a flashing block to indicate when to press the F1 or F2 keys.
Press <F2> to enter BIOS setup
Tip: If your computer is a new computer and you are unsure of what key to press when the computer is booting, try pressing and holding one or more keys the keyboard. This causes a stuck key error, which may allow you to enter the BIOS setup.
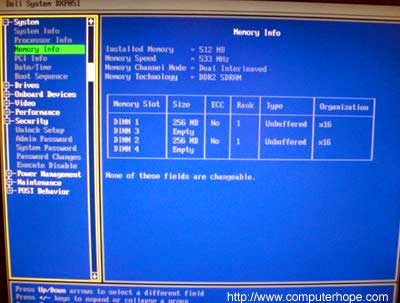
Once youve successfully entered the CMOS setup you should see a screen similar to the example below.
Older computers
Unlike the computers of today, older computers (before 1995
) had numerous different methods of entering the BIOS setup. Below is a listing of general key sequences that may have had to be pressed as the computer was booting.- CTRL + ALT + ESC
- CTRL + ALT + INS
- CTRL + ALT + ENTER
- CTRL + ALT + S
- PAGE UP KEY
- PAGE DOWN KEY
ACER BIOS
If your computer is unable to boot or you want to restore the BIOS back to bootable settings and your computer uses an ACER BIOS, press and hold the F10 key as you turn on the computer. While continuing to hold the F10 key, you should hear two beeps indicating that the settings have been restored.
AMI BIOS
Older AMI BIOS could be restored back to bootable settings by pressing and holding the Insert key as the computer is booting.
BIOS or CMOS diskettes
Early 486, 386, and 286 computers may have required a floppy disk in order to enter the BIOS setup. These diskettes are known as ICU, BBU, and SCU disks. Because these diskettes are unique to your computer manufacturer, you must obtain the diskettes from them.
Early IBM computers
Some models of early IBM computers required that the user press and hold both mouse buttons as the computer was booting in order to enter the BIOS setup.
Other suggestions
Finally, if none of the above suggestions help get you into your CMOS setup you can cause a stuck key error, which will usually cause the CMOS setup prompt to appear and remain until you press a key to continue. To do this press and hold any key on the keyboard and do not let go (you may get several beeps as youre doing this). Keep holding the key until the computer stops booting and youre prompted with an option to enter setup or to press another key to continue booting.
Additional information
What is the difference between BIOS and CMOS?
If this info helped to you, please make your contribution to support this Blog and our channel.
Additional information
What is the difference between BIOS and CMOS?
What are the F1 through F12 keys?
How to use system recovery options in Windows?
Random black screen while playing games
How to Delete and Clear Recent Items in Windows 7 Jump Lists
How to enter the BIOS or CMOS setup
What is the difference between BIOS and CMOS?
What are the F1 through F12 keys?
Durable Greenhouses made from Polycarbonate UV Protected material and Aluminum
ALSO PLEASE VISIT THIS VIDEOS AND SEE IF YOU FIND SOMETHING NEED:
Windows Registry Tools can be downloaded here:
How to kip your PC Private by deleting DATA Permanently
http://askpctech.blogspot.com/2016/03/kip-your-pc-privat.html
This tutorial is made up on request several users, is well is fallowing video:
1)How to Delete Paint Recent Pictures from List in Windows 7
2)Win 7– Fix for “Safely Remove Hardware and Eject Media” not working How To
3)Windows 10 How to Fix Black Screen After Booting
4)How To Remove Windows 10 Upgrade Notification On Windows 7 And Windows 8
5)How to Delete Face book Page Permanently - 2015
6)How to Uninstall Windows 10 and Downgrade to Windows 7 or 8.1
7)detected: not-a-virus:remoteadmin.win32
8)How to change pictures into icons for folders
9)Speed up your PC Disable System Restore on SSD
10)Speed up your PC Disable Scheduled De-fragmentation SSD
11)2015 Black screen of DEATH Windows 7 & 8 - with cursor at start-up SOLVED
12)Upon start up only wallpaper shows FIX
13)Here is video on Windows 7 & 8 - Black screen with cursor at start-up FIX
You can also open Task Manager by pressing Ctrl+Shift+Esc.
14) I bought a windows 7 PC but it Look alike old PC FIX:
15) Windows 7 & 8 - Black screen with cursor at start-up FIX:
16) How To Fix Minecraft OpenGL Error Windows 7 xp vista 720p :
17) removing bars using regscanner regedit & file shredder 720p:
18) How to Recover windows Explorer from error 2014 720p
19) HOW TO Save on battery online
20) Windows 7 & 8 - Black screen with cursor at start-up FIX
Upon start up only wallpaper shows no icons
CTL+ALT+DEL then click file and new task. then type explorer.exe and press ok
Best Greenhouse system 2015
If this info helped to you, please make your contribution to support this Blog and our channel.
SUBSCRIBE TO OUR NEW CHANNEL TO SEE:
Car Crush Compilation
Go to link Download
Friday, October 21, 2016
How to Fix BIOS Cant Save Settings
How to Fix BIOS Cant Save Settings
BIOS cant save settings, how to fix it. Characteristic this problem is every time turn on computer, show message; CMOS settings wrong, CMOS Date/Time not set, Press F1 to run SETUP. How to fix this problem

Solution No.1
BIOS cant save settings, caused by CMOS battery power runs out.
With Avometer, you can check CMOS battery.
Solution; replace CMOS battery with new one.
 Solution No.2
BIOS cant save configurations, cause by on-board peripherals not function / broken. Motherboard has few on-board peripherals, ex; PS2, LAN on-board, VGA on-board, sound on-board, USB slot, PCI slot, AGP slot, etc. How to identify on-board peripherals not function...? To identify this problem, example; USB slot not function (front USB and back USB). USB not function caused by two possible; driver corrupt and USB slot broken. Make sure, your driver no problem. If you sure, no problem with driver, and USB still not function, and every time turn on computer, press F1 to run setup (BIOS cant save settings), the conclusion is; BIOS cant save settings caused USB on-board broken.
Solution for this problem is disable USB function on BIOS, then insert USB card on PCI slot.
Note; some motherboard have USB jumper, you can try move jumper from 1-2, to 2-3. After jumper move (wait about 10 seconds), move back jumper to normal / 1-2. If USB still not function, the conclusion is USB broken.

Solution No.1
BIOS cant save settings, caused by CMOS battery power runs out.
With Avometer, you can check CMOS battery.
Solution; replace CMOS battery with new one.

BIOS cant save configurations, cause by on-board peripherals not function / broken. Motherboard has few on-board peripherals, ex; PS2, LAN on-board, VGA on-board, sound on-board, USB slot, PCI slot, AGP slot, etc. How to identify on-board peripherals not function...? To identify this problem, example; USB slot not function (front USB and back USB). USB not function caused by two possible; driver corrupt and USB slot broken. Make sure, your driver no problem. If you sure, no problem with driver, and USB still not function, and every time turn on computer, press F1 to run setup (BIOS cant save settings), the conclusion is; BIOS cant save settings caused USB on-board broken.
Solution for this problem is disable USB function on BIOS, then insert USB card on PCI slot.
Note; some motherboard have USB jumper, you can try move jumper from 1-2, to 2-3. After jumper move (wait about 10 seconds), move back jumper to normal / 1-2. If USB still not function, the conclusion is USB broken.
 |
| on board peripherals on mainboard |
 |
| insert USB card on PCI slot
|