Friday, May 5, 2017
How to Fix Problem 4gig ram installed win7 64bit saying only 3 gig usable
How to Fix Problem 4gig ram installed win7 64bit saying only 3 gig usable
4gig ram installed win7 64bit saying only 3 gig usable.
Hi i have just noticed Windows 764bit is saying only 3 gig is usable out of 4 gig, how to fix this?
anyhow
Motherboard: ASUS P5KPL/1600
CPU: Core 2 Duo E8400
Graphics card: XFX 9800gtx+ 512mb
Solutions to the Problem 4gig ram installed win7 64bit saying only 3 gig usable.
Download SmartPCFixer to Fix It (Free)
You Mainboard chipset doesnt support more than 4GB, so you cant use the whole 4GB:
http://blogs.msdn.com/hiltonl/archive/2007/04/13/the-3gb-not-4gb-ram-problem.aspx
André
"A programmer is just a tool which converts caffeine into code" CLIP- Stellvertreter http://www.winvistaside.de/
Make Sure that your Hardware Meets the System Requirements
You need to double-check your computers hardware configuration against the following Microsoft requirements. If your computer hardware is not up to par, then make sure you upgrade where necessary before continuing:
Microsoft Windows Requirements :
- 1 gigahertz (GHz) or faster 32-bit (x86) or 64-bit (x64) processor
- 1 gigabyte (GB) RAM (32-bit) or 2 GB RAM (64-bit)
- 16 GB available hard disk space (32-bit) or 20 GB (64-bit)
If your computer meets the minimum requirements above, then continue on…
Another Safe way to Repair the Problem: 4gig ram installed win7 64bit saying only 3 gig usable.:


How to Fix 4gig ram installed win7 64bit saying only 3 gig usable. with SmartPCFixer?
1. Download SmartPCFixer. Install it on your computer.

2. After the scan is finished, you can see the errors and problems which need to be repaired.

3. When the Fixing part is done, your computer has been speeded up and the errors have been removed

Related: How to Fix 3371 Errors in Windows XP,7,8&8.1?,Repair Corrupt Cab Files Error - How to Fix,Skchui.dll Error - How to Fix,Symantec Antivirus Slows Down Computer Error - How to Resolve,Error Windows Xp System Restore Incomplete Fix Solution,How to Fix - After updating from Internet Explorer 6 to Internet Explorer 9, my Favorites are lost?,How to Fix - Combination Stacked-Clustered Chart in Excel - Align data with horizontal tick marks?,Solution to Error: Macro to search and copy rows to different sheets based on cell value,Need solution to this problem in order to stop Vista from beeping.__"Your version of Microsoft Deprecated DLL Components isnt compatible with this version of Windows",Server Error in / Application.Site also runtime error [Solved]
Read More: How Can I Fix - 7 updates and then doesnt work properly?,How to Fix Problem - 7 backup fails and gives error Ox8007045D + Ox81000037?,How Can I Fix - 4.7 gb DVD-RAM disks OK, 2.6 gb will not read?,Tech Support: 360 Trial messed up my Excel 2007,Troubleshooter of Error: 32 or 64 Bit Version of Internet Explorer,2 msn.com site,2007 Performance Issue / Very slow saves to network share,Can I use my HP D110A web service printer as a proxy server?,can i use a zoom 56k v.92/v.90 modem with 64b dileup? netzero said i might have the rong modem?,Can I downgrade to win 32-bit?
Go to link Download
Thursday, May 4, 2017
Identify the Hardware installed in your computer to find its driver
Identify the Hardware installed in your computer to find its driver
So after windows installation you could get into trouble if the device driver is not found or can not be installed automatically because that device would stop working.So here are the steps to get that issue fixed.
Option 1
Step 1. Open device manager by typing Devmgmt.msc at run.
Step 2. Right mouse click on the unknown device and select properties.
Step 3. On the device properties window click on the Details tab and select Hardware Ids.
 |
| Pic-18(a) |
Step 4. Here you only need to note down these two information highlighted in the rectangle shown in the above picture-18(a).So as shown in the picture above note down VEN( Vendor ID) -168C ( as shown in the above picture) and DEV ( Part/Device ID )- 0032 as per the above picture.
Step 5. Go to website http://www.pcidatabase.com/ and then under vendor search Type the Vendor ID as 168C or whatever it shows in your device properties windows for that unknown hardware, and then hit search.
 |
| Pic-18(b) |
 |
| Pic-18(d) |
Step 7. so you will need to find the device with code mentioned in the Hardware Ids as DEV which is 0032 in my case.
 |
| Pic-18(e) |
Option 2
Option two is the easiest and best way to identify the unknown device.There is this tool name Hardware Identify from Tweaking.com.you can download it from the download tab of my blog or click here.
Tweaking.com - Hardware Identify will help identify unknown hardware on your system. This program does not help you download drivers but helps let you know what the hardware is so you know what drivers to find.
For example say you just reinstalled a computer and the device manager shows multiple unknown hardware with no drivers installed. Well you dont know what drivers to find since you dont know what the hardware is. Now with Tweaking.com - Hardware Identify you can see what that hardware is.
The program also has a easy option to help improve the device database. Once you have all drivers installed you can have the program check for any hardware on the system that isnt in the database and submit it to Tweaking.com. With in a few days the database will be updated and the device list will grow with the help of users like you!
Picture below was taken from Tweaking .com for the educational and instructional purposes.
 |
| Pic-18(f) |
..
Note: Any suggestion or comments to improve this article is very welcome and appreciated.Please write to me at nasir@simulato.com in case you have any queries.
People also read following top most searched issue
Go to link Download
Monday, April 10, 2017
How I installed Owncloud v6 0 3 on Ubuntu Server 14 04
How I installed Owncloud v6 0 3 on Ubuntu Server 14 04
Update; 1 Jul 14
Decided to try installing via the:
http://software.opensuse.org/download/package?project=isv:ownCloud:community&package=owncloud

The version installed was 6.0.4.1 at the time.
This gives the ability if there are updates that they will be installed automatically through apt-get updates and no more manual updates.
I crossed out the items that were not necessary with the update install version verses the manual install.
So...
1. Installed Ubuntu Server 14.04 on the computer.
2. Installed with OpenSSH and LAMP. Root should be the default admin account created for mysql. Remember the password.
3. Performed updates:
sudo apt-get update
4. Performed upgrades:
sudo apt-get upgrade
5. Perform additional required installs (In Accordance With [IAW] Owncloud v6 Manual Installation):
sudo apt-get install php5-gd php5-json php5-mysql php5-curl php5-intl php5-mcrypt php5-imagick
sudo sh -c "echo deb http://download.opensuse.org/repositories/isv:/ownCloud:/community/xUbuntu_14.04/ / >> /etc/apt/sources.list.d/owncloud.list"
sudo apt-get update
wget http://download.opensuse.org/repositories/isv:ownCloud:community/xUbuntu_14.04/Release.key
sudo apt-key add - < Release.key
sudo apt-get install owncloud
sudo chown -R www-data:www-data /var/www/html/owncloud
10. Enabled ssl within Apache2"
sudo a2enmod ssl
sudo a2ensite default-ssl
sudo service apache2 restart
11. Modified the default-ssl file for Apache2:
sudo nano /etc/apache2/sites-available/default-ssl.conf Add ServerName; 
<Directory /var/www/html/owncloud>
 Options Indexes FollowSymLinks MultiViews
 AllowOverride All
 Require all granted
</Directory> 
12. Enable mod_rewrite
sudo a2enmod rewritesudo service apache2 restart 13. Might get error "Could not reliably determine the servers fully qualified domain name"
Add FQDN to /etc/hosts
sudo nano /etc/hosts

sudo service apache2 restart14. Log into your owncloud via http
-You will get a warning that your data directory is exposed. Well change that later.
-Create an admin account name with password.
-Leave the data folder alone.
-Hopefully you remembered the mysql root password.
-Call you database "owncloud_db".
-The database will be located on the "localhost".

15. Close the client download window.
-Select admin (upper right corner) --> users
16. Create your first user.
-Provide that user with enough storage space.
-Select admin again and logout.

sudo mv /var/www/html/owncloud/data /
18.
You will need to edit the config.php file and add the fqdn:
sudo nano /var/www/
Add your FQDN; 1=> owncloud.no-ip.info

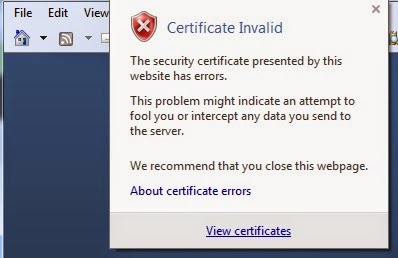
19. You should be able to access https now without complaint. Running owncloud through http is not healthy. It should be running under https. If you check the ssl cert (view certificates) the default cert used should be from the ubuntu installation and have the computer name in the "issued to" "issued by".
20. OPTIONAL if you dont like the default sizes to upload make these changes:
sudo nano /etc/php5/apache2/php.ini
Change;
post_max_size = 4G
cgi.fix_pathinfo = 0
upload_max_filesize = 4G
date.timezone = "America/New_York"
21. You should be good to go.
UPDATE; 16 Jun 14
1. If you get the following error:
isWebDAVWorking: NO - Reason: [CURL] Error while making request: SSL: certificate subject name XXXXX does not match target host name YYYYYsudo nano /var/www/html/owncloud/3rdparty/Sabre/DAV/client.php
Find; <ctrl w>curlsettingsAdd below;CURLOPT_SSL_VERIFYPEER => 0,
CURLOPT_SSL_VERIFYHOST => 0, 
sudo service apache2 restart2. I also added my own self created certs instead of using the default.
Now to get https ssl working with OwnCloud I created self-signed certs. Remember the self signed password as it will ask you again.
sudo openssl genrsa -des3 -out /etc/ssl/server.key 4096
sudo openssl req -new -key /etc/ssl/server.key -out /etc/ssl/server.csr
sudo openssl x509 -req -days 3650 -in /etc/ssl/server.csr -signkey /etc/ssl/server.key -out /etc/ssl/server.crt
sudo openssl rsa -in /etc/ssl/server.key -out /etc/ssl/server.key.insecure
sudo mv /etc/ssl/server.key /etc/ssl/server.key.secure
Go to link Download
Tuesday, December 6, 2016
How to boot into Windows 7 when grub is installed in the Windows partition
How to boot into Windows 7 when grub is installed in the Windows partition


Boot Windows 7 "mbr" or the bootloader windowssystem32winload.exe (without using windows 7 repair disk)
What if you install Second Windows 7 as Secondary OS and you have an error:
Windows Boot ManagerAlternative error messages:
Windows failed to start. A recent hardware or software change might be the cause. To fix the problem:
1. Insert your Windows installation disc and restart your computer.
2. Choose your language settings, and then click "Next."
3. Click "Repair your computer."
If you do not have this disc, contact your system administrator or computer manufacturer for assistance
File: Windowssystem32winload.exe
Status: 0xc000000e
Info: The selected entry could not be loaded because the application is missing or corrupt
Another common way to troubleshoot this error is to search for “Missing or corrupt winload.exe“.
This error happens when Windows’ BOOTMGR tries to load the BootBCD registry (master boot record), but it’s either corrupted or has a bad configuration. At this step the boot loading process simply stops and the status code appears.
Windows Setup CD/DVD Required! (if you do not have one scroll down to option two)Some of the solutions below require the use of the Microsoft Windows setup CD or DVD. If your PC did not come with a Windows installation disc or if you no longer have your Windows setup media, you can use Easy Recovery Essentials for Windows instead. EasyRE will automatically find and fix many problems, and can also be used to solve this problem with the directions below.
Fix #a: Rebuild the BCD with Bootrec.exe
BCD stands for Boot Configuration Data, contains boot configurations options and controls how your Windows is started.
Bootrec.exe is a tool built in the Windows Recovery Environment (Windows RE) that can repair boot configuration data and master boot records. You can access Bootrec.exe using a Windows installation disc.
Insert your Windows install disc and boot from it
Press any key at the “Press any key to boot from CD or DVD” message
Choose Repair your computer after you select the language, time and keyboard method
Select your Windows installation drive (usually C:) and click Next
Select Command Prompt in the System Recovery Options box
Write bootrec /rebuildbcd and press Enter:
bootrec /rebuildbcd
Press Enter
Wait for the program to finish
Fix #b: Use sfc /scannow
A sfc /scannow (sfc stands for System File Checker) command will scan all Windows protected files to try replace the corrupt ones with the correct versions.
Here are the steps to run sfc:
Boot from the install CD
Select your language, time and keyboard method
Click on Repair your computer
Select your operating system when the System Recovery Options box appears, but note down the drive’s letter (e.g. F:, G: etc.). In our example this will be D:.
Select Command Prompt
Type the following command with your hard drive’s letter:
sfc /scannow
Press Enter
When scanning is complete, type exit to quit the Command Prompt:
exit
Press Enter
Restart your computer
You need a free Windows Live account for that, but you can created one. A fake name is fine as your real name.
To use the downloaded iso, you have to burn it on a DVD in a special way. Namely as a raw image, not directly as .ISO file.
In Windows (all versions) proceed as follows:
You can use your favorite burning application for this, but its probably a lot easier with the free Windows application ImgBurn.
You can download this fine free-ware application here. Note: take care not to install an extra load of useless rubbish during installation.... You only need the ImgBurn itself.
After the installation of ImgBurn, you can use it now ~ click here to see how to use it.
Note: burn the DVD at low speed, preferably at 4 x. That way you greatly reduce the risk of burning errors.

Go to link Download