Showing posts with label ipad. Show all posts
Showing posts with label ipad. Show all posts
Friday, May 12, 2017
How to restore your iPhone iPad or iPod back to factory default settings if you have forgotten the passcode
How to restore your iPhone iPad or iPod back to factory default settings if you have forgotten the passcode
Hi,
Now the next thing required is an iTune software on your PC.If you already have iTunes installed make sure its an updated version or update it to the latest version.And if you dont have iTunes you can download it from Download center of my blog and install it on your PC or just click here to download iTunes.
Now after you have installed the iTunes and open it first time it will show you the welcome screen as shown in the picture below.
iTunes is a media management software created by Apple, Inc., for both the Macintosh and Windows operating systems. You can use it to manage and play both audio and video files on your computer.You can take it anywhere which means all the contents like songs, your playlists, purchase and other stored items are available to you everywhere whenever and wherever you login onto iTunes using your Apple Id.
Someone else can log onto his iTunes account on your iPad if he signs out of your ID in the settings app first.The option can be found by selecting iTunes and App Store, then tapping on your ID. Any purchases downloaded on the device stay until they are deleted, but apps must be updated using the ID that originally downloaded them.And You can share purchases from both accounts on the same iPad with very little difficulty.
iTunes can also be used to restore and back up your settings, Messages, Camera Roll, documents, saved games, and other data loke Histories, cookies, bookmarks and much more. Backups dont contain content synced to the device, such as movies, music, podcasts, and apps.
If you choose to backup your iOS device on your PC it is saves the back up files at the following location, otherwise you can choose to save the back up at iCloud.
Mac: ~/Library/Application Support/MobileSync/Backup/
The "~" represents your Home folder. If you dont see Library in your home folder, hold Option and click the Go menu.
Windows XP: Documents and Settings(username)Application DataApple ComputerMobileSyncBackup
To quickly access the Application Data folder, click Start, and choose Run. Type %appdata% and click OK.
Windows Vista, Windows 7, and Windows 8: Users(username)AppDataRoamingApple ComputerMobileSyncBackup
To quickly access the AppData folder, click Start. In the search bar, type %appdata% and press Return.
Restoring your iPhone, iPad or iPod
Now depending on the condition of your phone you can go about this a number of ways. If your phone is functioning you can simply click "Settings" then go to "About" and click "Restore to Factory Defaults". If however the phone is not working it can be a little trickier. If you have forgotten the password and can not access the settings menu.Then you have to connect your iOS device to iTunes on your PC and restore it under recovery mode.

5. Now as in the picture 7(e) above click OK and then Click Restore.Its now gonna ask you are sure you want to restore this iPhone to its factory default settings as shown in the pic-7(f) below, Click Restore and update.It will then start restoring the device which may take several minutes so make sure your computer has a power source connected to avoid unwanted power outage.
Additional Information
If you started your device in recovery mode by mistake, restart it to exit recovery mode. Or you can just wait-after 15 minutes the device will exit recovery mode by itself.
Method-3. Using DFU Mode in iPhone, iPad and iPod touch (Recovery)
In addition to recovery mode on iPhone, iPad and iPod touch, the iOS-based iDevices also has another mode which calls DFU. The main difference between the recovery mode and DFU mode is whether iBoot bootloader is loaded or bypassed during boot, with iBoot agent, when available, ensures that user cannot flash a firmware OS software which is lower or older version than the current one, effectively disable downgrade.
In recovery mode, which is the standard default way to upgrade or restore iDevices, iBoot is used when restoring or upgrade iPhone to make sure that the a iOS .ipsw which has the version number greater than or equal to current one is flashed or written to the device, or otherwise does not allow restoration process to proceed. In addition, unless the iPhone, iPad and iPod touch has been jailbroken or pwned”, custom-built firmware OS cannot be flashed. If the device is not connected to computer in recovery mode, the screen will display “Please connect to iTunes” logo.
DFU mode bypasses the loading of iBoot while still maintain the interfacing with iTunes, allow a older or lower version of iOS .ipsw to be flashed and restored to the device, including flashing a custom-build or home-made firmware iOS software. DFU mode is mostly used by hackers to downgrade or upgrade with a pre-jailbroken firmware created by PwnageTool. In DFU mode, the screen is totally black with no text display, just like when the phone is in power down state.
Here’s how to enter DFU Mode in iPhone, iPad and iPod touch:
1. Power on the iPhone, iPad or iPod touch if it’s in off state.
2. Connect the device to computer via USB cable or dock.
3. Run and open the iTunes program so that user will be notified when device enters DFU mode.
4. Press and hold Power or Sleep-Wake and Home buttons simultaneously for 10 seconds.
5. Release the Power or Sleep-Wake button and continue holding the Home button for 10 to 60 more seconds.
6. Wait until iTunes detects and recognizes the iDevice in DFU Recovery mode with notification message or system sound indicating hardware connect or disconnect.
Now you will see the message as shown below.

Alright So thats Enough to know about restoration..If you have any question or doubt please feel free to contact me at nasir@simulato.com.
In the next Post I am gonna write some interesting troubleshooting on Printers So Stay connected keep visiting.
Happy troubleshooting..
Best of Luck.!!!
Nasir
Today I am gonna tell you how to restore you iOS device (iPad, iPhone,iPod) back to the factory default settings if you have forgotten the password.So be it any reason like incorrect password for Apple ID or iPhone Locked due to any xyz reason, you can get your device back to the factory default settings but be cautious that you may loose your contacts and messages if you havent had backup of them.
So let me start with the buttons that we will be using to do this all troubleshooting.We will only be using two buttons which are sleep/Wake or On/Off button and Home button.Look at the picture 7(a) below for the reference.
 |
| Pic-7(a) |
Now after you have installed the iTunes and open it first time it will show you the welcome screen as shown in the picture below.
 |
| Pic-7(b) |
iTunes is a media management software created by Apple, Inc., for both the Macintosh and Windows operating systems. You can use it to manage and play both audio and video files on your computer.You can take it anywhere which means all the contents like songs, your playlists, purchase and other stored items are available to you everywhere whenever and wherever you login onto iTunes using your Apple Id.
Someone else can log onto his iTunes account on your iPad if he signs out of your ID in the settings app first.The option can be found by selecting iTunes and App Store, then tapping on your ID. Any purchases downloaded on the device stay until they are deleted, but apps must be updated using the ID that originally downloaded them.And You can share purchases from both accounts on the same iPad with very little difficulty.
iTunes can also be used to restore and back up your settings, Messages, Camera Roll, documents, saved games, and other data loke Histories, cookies, bookmarks and much more. Backups dont contain content synced to the device, such as movies, music, podcasts, and apps.
If you choose to backup your iOS device on your PC it is saves the back up files at the following location, otherwise you can choose to save the back up at iCloud.
Mac: ~/Library/Application Support/MobileSync/Backup/
The "~" represents your Home folder. If you dont see Library in your home folder, hold Option and click the Go menu.
Windows XP: Documents and Settings(username)Application DataApple ComputerMobileSyncBackup
To quickly access the Application Data folder, click Start, and choose Run. Type %appdata% and click OK.
Windows Vista, Windows 7, and Windows 8: Users(username)AppDataRoamingApple ComputerMobileSyncBackup
To quickly access the AppData folder, click Start. In the search bar, type %appdata% and press Return.
Restoring your iPhone, iPad or iPod
Now depending on the condition of your phone you can go about this a number of ways. If your phone is functioning you can simply click "Settings" then go to "About" and click "Restore to Factory Defaults". If however the phone is not working it can be a little trickier. If you have forgotten the password and can not access the settings menu.Then you have to connect your iOS device to iTunes on your PC and restore it under recovery mode.
Now I am gonna show you the steps to restore your iOS device to factory default settings using iTunes in Recovery Mode.The steps are as mentioned below which I got from Apple Support website KB article #HT1808.
Method -1. Reset and Restore iPhone to Original Default Factory Settings with Recovery Mode
iPhone display freezing? iPhone doesn’t detect by or appear in iTunes? iPhone cannot sync with iTunes on PC or Mac? Cannot make or receive calls, send or receive text messages, or access email or the web? Or worse, iPhone simply won’t turn on and does not respond to tap or button press? If the problem still persists after you have reseted the iPhone, or tried various iPhone troubleshooting, it may be worthwhile to invoke recovery mode to restore iPhone to default factory settings, the original state as when you first received and unwrapped the phone.
Restoration of iPhone to original factory defaults will likely to fix all problem, with the downside that all data and information stored on your phone will be lost. Normally iTunes will make a backup automatically when you connect and sync the iPhone with the program, however, it’s still a good recommendation to copy out and backup everything that you may need on the phone before proceed to restore the iPhone.
To restore iPhone and reset the phone to default factory settings, follow these steps:
1. Turn off iPhone – Hold down the Sleep/Wake button for a few seconds until the red slider appears, then slide the red slider. Ignore this step if your iPhone is already off.
2. Press and hold down the Home button for about 10 seconds until a yellow triangle with a text which says Please Connect to iTunes appears.

Method -1. Reset and Restore iPhone to Original Default Factory Settings with Recovery Mode
iPhone display freezing? iPhone doesn’t detect by or appear in iTunes? iPhone cannot sync with iTunes on PC or Mac? Cannot make or receive calls, send or receive text messages, or access email or the web? Or worse, iPhone simply won’t turn on and does not respond to tap or button press? If the problem still persists after you have reseted the iPhone, or tried various iPhone troubleshooting, it may be worthwhile to invoke recovery mode to restore iPhone to default factory settings, the original state as when you first received and unwrapped the phone.
Restoration of iPhone to original factory defaults will likely to fix all problem, with the downside that all data and information stored on your phone will be lost. Normally iTunes will make a backup automatically when you connect and sync the iPhone with the program, however, it’s still a good recommendation to copy out and backup everything that you may need on the phone before proceed to restore the iPhone.
To restore iPhone and reset the phone to default factory settings, follow these steps:
1. Turn off iPhone – Hold down the Sleep/Wake button for a few seconds until the red slider appears, then slide the red slider. Ignore this step if your iPhone is already off.
2. Press and hold down the Home button for about 10 seconds until a yellow triangle with a text which says Please Connect to iTunes appears.
3. Plug the iPhone into Mac or Windows PC. Release the button if you haven’t.
4. Run and open iTunes if it’s not already opened yet.
5. iTunes will prompt a message that says iTunes has detected an iPhone in recovery mode. Click OK.
6. You will be taken to the iPhone pane. Then, click on Restore.
7. Wait for the full restoration process to complete, and the iPhone will be back to the original settings state as when it left the manufacturing factory, typically a working phone again if you face any problem, unless it’s hardware related.
There is another mode called DFU mode which does not load the iBoot, and commonly used to downgrade the firmware and restore custom IPSW.
If above stated method does not work move onto the next Method-2.
Method -1. Reset and Restore iPhone to Original Default Factory Settings with Recovery Mode
If you cant update or restore your iOS device
You can use recovery mode if you cant update or restore your iOS device.
You might need to use recovery mode if:
- You cant update or restore because iTunes doesnt recognize your device or says its "in recovery mode".
- The Apple logo remains onscreen for several minutes with no progress bar.
- The Connect to iTunes screen appears.
See what to do if the progress bar remains onscreen for several minutes
Use recovery mode
Recovery mode erases your device and restores it, which should resolve the issue. If you previously synced with iTunes or iCloud, you may be able to restore from your backup after recovery.
- Turn off your device. If you cant turn it off, press and hold the Sleep/Wake and Home buttons at the same time and wait a few seconds for it to turn off.
- Plug the devices USB cable into your computer only.
- Hold down the devices Home button as you connect the USB cable to it.
- When you see the Connect to iTunes screen, release the Home button. If you dont see this screen, try steps 1 through 3 one more time.
 |
| Pic-7(c) |
iTunes should open and display a message such as: "iTunes has detected an iPhone in recovery mode. You must restore this iPhone before it can be used with iTunes."Look at the pictures below you might see the screen like one of these pictures shown below just click on Restore option.
 |
| Pic-7(d) |
 |
| Pic-7(e) |
5. Now as in the picture 7(e) above click OK and then Click Restore.Its now gonna ask you are sure you want to restore this iPhone to its factory default settings as shown in the pic-7(f) below, Click Restore and update.It will then start restoring the device which may take several minutes so make sure your computer has a power source connected to avoid unwanted power outage.
 |
| Pic-7(f) |
Additional Information
If you started your device in recovery mode by mistake, restart it to exit recovery mode. Or you can just wait-after 15 minutes the device will exit recovery mode by itself.
Method-3. Using DFU Mode in iPhone, iPad and iPod touch (Recovery)
In addition to recovery mode on iPhone, iPad and iPod touch, the iOS-based iDevices also has another mode which calls DFU. The main difference between the recovery mode and DFU mode is whether iBoot bootloader is loaded or bypassed during boot, with iBoot agent, when available, ensures that user cannot flash a firmware OS software which is lower or older version than the current one, effectively disable downgrade.
In recovery mode, which is the standard default way to upgrade or restore iDevices, iBoot is used when restoring or upgrade iPhone to make sure that the a iOS .ipsw which has the version number greater than or equal to current one is flashed or written to the device, or otherwise does not allow restoration process to proceed. In addition, unless the iPhone, iPad and iPod touch has been jailbroken or pwned”, custom-built firmware OS cannot be flashed. If the device is not connected to computer in recovery mode, the screen will display “Please connect to iTunes” logo.
DFU mode bypasses the loading of iBoot while still maintain the interfacing with iTunes, allow a older or lower version of iOS .ipsw to be flashed and restored to the device, including flashing a custom-build or home-made firmware iOS software. DFU mode is mostly used by hackers to downgrade or upgrade with a pre-jailbroken firmware created by PwnageTool. In DFU mode, the screen is totally black with no text display, just like when the phone is in power down state.
Here’s how to enter DFU Mode in iPhone, iPad and iPod touch:
1. Power on the iPhone, iPad or iPod touch if it’s in off state.
2. Connect the device to computer via USB cable or dock.
3. Run and open the iTunes program so that user will be notified when device enters DFU mode.
4. Press and hold Power or Sleep-Wake and Home buttons simultaneously for 10 seconds.
5. Release the Power or Sleep-Wake button and continue holding the Home button for 10 to 60 more seconds.
6. Wait until iTunes detects and recognizes the iDevice in DFU Recovery mode with notification message or system sound indicating hardware connect or disconnect.
 |
| Pic-7(g) |
Now you will see the message as shown below.
7.The device is now in DFU mode.
Tip: Screen during DFU mode should be black (Off), thus if there is a “Please connect to iTunes” logo, or any other text, retry the steps above again. Reboot the device by pressing both “Power” or “Sleep-Wake” and “Home” buttons until Apple logo appears to turn on the phone.
If you want to exit DFU mode, hold down the Sleep/Wake or Power button and the Home button at the same time for at least ten seconds, until the Apple logo appears.
Alright So thats Enough to know about restoration..If you have any question or doubt please feel free to contact me at nasir@simulato.com.
In the next Post I am gonna write some interesting troubleshooting on Printers So Stay connected keep visiting.
Happy troubleshooting..
Best of Luck.!!!
Nasir
Go to link Download

Sunday, May 7, 2017
How to Forward SMS or iMessage on iPhone and iPad
How to Forward SMS or iMessage on iPhone and iPad
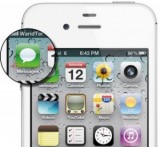
If your iPhone or iPad that you have today is new to you and takes time to be able to operate seamlessly, I gladly share information with you. And we want to give this time is the way forward SMS also iMessage on your iPhone or iPad.
1. Through the Message app, open the SMS / iMessage that you want to forward.
2. Tap Edit button located at the upper-right corner of the screen.
3. Select the message you want to forward.
4. Tap on the Forward on the bottom-right corner.

5. Now the iPhone / iPad you are ready to forward SMS / iMessage, just enter the phone number or contact details available on the contact list and tap on the Send to send.
Thats all you need to do. Easy, is not it? Hopefully these tips useful;)
Go to link Download
Sunday, February 19, 2017
How to Conserve Battery iPad iPhone and iPod
How to Conserve Battery iPad iPhone and iPod
Have an iDevice but are often made dizzy because the battery drop at crucial moments? There are some tips in this article that you can try to maximize battery iPhone / iPod / iPad. Some tips will be easy to digest because it makes sense, but you might be surprised with some of the other tips. Please see one by one:
How to Conserve Battery iPad, iPhone and iPod
1. Keep your iDevice from the sun
Whatever you do with your iPhone, iPod or iPad, wherever and whenever, remember to always keep them from sunlight. Not only the sun, but every HEAT. This means that if you are in a room without adequate ventilation, no air conditioning, or in a hot car for vehicle engines, then you may not use or store the iDevice in places like that.
The explanation is simple, hot (whatever its source) will be very easy to turn off the battery than any factor. If you are in a hot spot, even though the iPad battery has to be charged for hours, still it will be eroded by the heat and you have to charge again. If it is too often the case then the battery will wear out and you have to replace it. In conclusion, use and store in a cool iDevice.
2. Reduce the brightness
Very high levels of brighness certainly require high battery power. You do not need to set it especially at night. Just set the brightness level at 30% position via Settings> Brightness & Wallpaper.
3. Auto-Lock
Make sure the screen is locked quickly. Select the lowest minutes available on the iPhone. The reason? Although you have set the brightness at low levels but still remain in a state if the iPhone unlock in the long term without you using it for work, the screen still requires battery power. Set auto-lock through General> Auto-Lock. You will feel the difference, especially if you are used to keep the iPhone in my pocket in a state of un-locked displays.
4. Airplane Mode (iPad / iPhone)
If you are crazy about Angry Birds game and spend up to 8 hours of playing the game, just use Airplane Mode. This is because we can be sure you will not use the internet on the iPad / iPhone while playing Angry Birds. It should be remembered when you turn on Airplane Mode then all the phone calls on the iPhone can not enter. But if you do not mind the activities jamming game Angry Birds disturbed many phones, so just disable Airplane Mode.
Another reason is to enable this mode when you are in the difficult area mobile networks and the Internet. Why? for iPhone and iPad will repeatedly try to get the connection. Impact of course will use more battery power. You can set the Settings> Airplane Mode.
5. Use WiFi, not 3G
If it may be better to use WiFi only, not 3G. Apple said the iPads battery can last up to 10 hours when used with a WiFi connection, but only 9 hours if the 3G. IPhone battery on WiFi network can last up to 10 hours but only 6 hours when used on 3G networks. Arrangements can be made in Settings> Wi-Fi, select the network you want.
6. Mail & Calendar Checking
Reduce the menu list on the Mail, Contact, Calendar. If you have a stack configuration on the email, calendar, or contacts, then the menu will check email periodically once downloaded continuously. And it takes a battery.
You can set it in Settings> Mail, Contacts, Calendars> Fetch New Data, set at the time the longest or just choose Manually to check manually.
7. Push Notification
As much as possible reduce the number of Push Notification. Check any application that is not so important for you to get notifications. Look in Settings -> Notifications, and turn off notifications for apps that are not so important. This will save battery life by reducing the data from the internet that was downloaded to your iPhone.
8. System Sounds
Reducing System Sounds? It sounds silly, but you should practice these tips. System Sounds really only use a small amount of battery power but if you are careful and want to turn off everything in the System Sounds, then the battery will be more efficient. Set in Settings> General> Sounds.
9. Disable Location Services
If you do not require Location Services, just disable this menu to save a little battery. Set in Settings> General> Location Services> OFF.
10. Bluetooth
If not using a headset or bluetooth keyboard, you should turn off this feature. Activate bluetooth continuous course requires its own battery power. Enable if you really need. Set in Settings> General-> Bluetooth> ON / OFF.
11. Turn off Vibrate
A number of games using the vibration feature if you know, it requires battery power. Non-turn vibration on the games you play often because it will save the battery.
12. Charge and Discharge
iDevice you need this service at least once a month (see the article about Battery Calibration). Do not forget to also charge the battery as soon as possible without waiting for the battery is completely discharged and die in a long time.
Good luck, and hopefully yours iDevice battery can be maintained and preserved
Go to link Download
Saturday, November 5, 2016
iFlicks for Windows 10 8 1 8 7 iTunes iPad Apple TV iPod iPhone
iFlicks for Windows 10 8 1 8 7 iTunes iPad Apple TV iPod iPhone
iFlicks offers an ultimate way to handle your movies, TV shows and iTunes, you can add metadata for better organize iTunes. Most of the softwares similar to iFlicks are based on Mac OS. Maybe you have spent months of Sundays to find an iFlicks alternative for Windows. And till now, there is in fact no iFlicks equivalent that is as powerful as iFlicks to handle videos and iTunes. However, there are some alternatives to iFlicks that can help you convert videos to iTunes so that you can better organize your media. This article will show you an ideal Windows iFlicks Alternative - Pavtube Video Converter Ultimate.
At first you need to know: iFlicks supports these formats:
* File formats: avi, divx, flv, m4v, mkv, mov, mp4
* Video types: MS-MPEG4 v1 & v2, DivX, 3ivx, H.264, VP6, H263i, VP3, MPEG1 & MPEG2 Video
Maybe you have spent months of Sundays to find an iFlicks alternative for Windows. Now you are right here. Luckily, The recommended iFlicks for Windows (Including Windows 10) is Pavtube Video Converter Ultimate, an Ultimate tool to meet your multimedia needs. Also it can be acted as a metadata editor for iTunes, making you easily personalize metadata manually. Here is review. With it, you can effortlessly:
1. Convert all regular formats like AVI, MP4, WMV, FLV, MKV, MPG, MPEG, 3GP, VOB, etc. to iTunes.
2. Rip DVD movies to iTunes friendly video format.
3. Burn iTunes movies to DVD for playing on DVD player or TV.
4. Download videos from YouTube, Facebook, Vimeo, Hulu, etc.
5. Remove DRM protection from iTunes movies.
6. Convert 2D videos to 3D videos.
Now, Just Free Download iFlicks Alternative for Windows or Mac:


Other Download:
- Pavtube old official address: http://www.pavtube.cn/blu-ray-video-converter-ultimate/
- Cnet Download: http://download.cnet.com/Pavtube-Video-Converter-Ultimate/3000-2194_4-75938564.html
How to Use This iFlicks Alternative for Windows 2003/XP/Vista/7/8/8.1/10
Below is a step by step guide to use this iFlicks Alternative for Windows. Pavtube Video Converter Ultimate has a well optimized interface. Even to a beginner, you will quickly know how to master this application. Please read the 4 steps below. If you are looking for a iFlick alternative for Mac, please click Pavtube iMedia Converter for Mac or you need to know: How to move files from a Windows PC to a Mac in stead of download the mac version.
Step 1: Add files into the iFlicks Alternative for Windows
Run the iFlicks Alternative for Windows. Launch it; click “Add Video” and load your Video files. Or directly drag and drip your video source to the program. It supports batch conversion so you can import multiple files at a time.

Step 2: Set Apple Device as Output Format
Click the down arrow button under “Output Format” to pop up the Output Format window, lick “Apple” to choose your Apple device, like iPhone, iPad, or Apple TV. Also you can click the “Format” icon to set MP4 as the output format.

Learn >> Apple TV Best Format | iPhone 6 Best Format | iPad Air 2 & Mini 3 Best Format…
Step 3: Convert Media to iTunes format
Click the “Convert” button to start converting the media video or audio files to iTunes supported format. It will be finished with fast conversion speed and great output quality. Then, you can click “Open” button to drag the converted media files to iTunes for easy playback or for sync to Apple TV, iPads oriPhone.
Much wonderful software bundled with Video Converter Ultimate will provide you more amazing experience in converting videos. Go to Money Saving Software Bundles to get special offer for more software, such as ByteCopy + Video Converter Ultimate = Only $79.9, Save $27.1, Video Converter Ultimate($65) + ChewTune($29) = Only $74.9, Save $19.1 and so on.
Read More:
At first you need to know: iFlicks supports these formats:
* File formats: avi, divx, flv, m4v, mkv, mov, mp4
* Video types: MS-MPEG4 v1 & v2, DivX, 3ivx, H.264, VP6, H263i, VP3, MPEG1 & MPEG2 Video
Maybe you have spent months of Sundays to find an iFlicks alternative for Windows. Now you are right here. Luckily, The recommended iFlicks for Windows (Including Windows 10) is Pavtube Video Converter Ultimate, an Ultimate tool to meet your multimedia needs. Also it can be acted as a metadata editor for iTunes, making you easily personalize metadata manually. Here is review. With it, you can effortlessly:
1. Convert all regular formats like AVI, MP4, WMV, FLV, MKV, MPG, MPEG, 3GP, VOB, etc. to iTunes.
2. Rip DVD movies to iTunes friendly video format.
3. Burn iTunes movies to DVD for playing on DVD player or TV.
4. Download videos from YouTube, Facebook, Vimeo, Hulu, etc.
5. Remove DRM protection from iTunes movies.
6. Convert 2D videos to 3D videos.
Now, Just Free Download iFlicks Alternative for Windows or Mac:
Other Download:
- Pavtube old official address: http://www.pavtube.cn/blu-ray-video-converter-ultimate/
- Cnet Download: http://download.cnet.com/Pavtube-Video-Converter-Ultimate/3000-2194_4-75938564.html
How to Use This iFlicks Alternative for Windows 2003/XP/Vista/7/8/8.1/10
Below is a step by step guide to use this iFlicks Alternative for Windows. Pavtube Video Converter Ultimate has a well optimized interface. Even to a beginner, you will quickly know how to master this application. Please read the 4 steps below. If you are looking for a iFlick alternative for Mac, please click Pavtube iMedia Converter for Mac or you need to know: How to move files from a Windows PC to a Mac in stead of download the mac version.
Step 1: Add files into the iFlicks Alternative for Windows
Run the iFlicks Alternative for Windows. Launch it; click “Add Video” and load your Video files. Or directly drag and drip your video source to the program. It supports batch conversion so you can import multiple files at a time.
Step 2: Set Apple Device as Output Format
Click the down arrow button under “Output Format” to pop up the Output Format window, lick “Apple” to choose your Apple device, like iPhone, iPad, or Apple TV. Also you can click the “Format” icon to set MP4 as the output format.
Learn >> Apple TV Best Format | iPhone 6 Best Format | iPad Air 2 & Mini 3 Best Format…
Step 3: Convert Media to iTunes format
Click the “Convert” button to start converting the media video or audio files to iTunes supported format. It will be finished with fast conversion speed and great output quality. Then, you can click “Open” button to drag the converted media files to iTunes for easy playback or for sync to Apple TV, iPads oriPhone.
Much wonderful software bundled with Video Converter Ultimate will provide you more amazing experience in converting videos. Go to Money Saving Software Bundles to get special offer for more software, such as ByteCopy + Video Converter Ultimate = Only $79.9, Save $27.1, Video Converter Ultimate($65) + ChewTune($29) = Only $74.9, Save $19.1 and so on.
Read More:
- Rip The Hunger Games collection for Playing on ATV 4
- Store Blu-rays to Raid-5 NAS for TV-Set/iPad/iPhone
- Best Kindle Comparison Review on 2016 and Best Software Recomended
- Best MP4 Joiner - How to Split or Join MP4 Files
- MakeMKV vs ByteCopy vs DVDfab - Top Blu-ray Ripper/Backup Review
Go to link Download
How Can I import and edit iPad MOV files in Sony Vegas Pro
How Can I import and edit iPad MOV files in Sony Vegas Pro
Outline: Cant render iPad video in Sony Vegas Pro 13/12/11? Trouble using iPad footage in Vegas Pro? Simply follow this article to find the easy solution.
Sony Vegas Pro makes it easy to import and edit movies, images and music for creating your next video or audio masterpiece. However, it will be a frustrating thing if you have problems of importing video files to Sony Vegas, especially the video files are the so common MP4 files. Many people love to use their iPad (iPad Pro, iPad Mini, iPad Air, iPad 4, etc.) to shoot videos. Before uploading to YouTube or posting them on Facebook, many people like to edit them. But, the audio doesnt import, the video is clunky and choppy. Have the same problems when importing iPad videos to Sony Vegas Pro 10/11/12/13 for editing?
Got some tech support online, I got know, iPad records .MOV videos in H.264 codec. While, Sony Vegas Pro is pretty picky with the codecs of what itll accept; it doesnt like H.264. To solve the issue, a common practical way is to convert iPad video to Sony Vegas most compatible video like MPEG-2. Follow this simple tutorial to find the reason and the solution to fix the problem.
To make iPad videos compatible with Sony Vegas Pro, here we need a workable video conversion program to convert iPad video files to Sony Vegas Pro edit-friendly formats. Pavtube Video Converter Ultimate is highly recommended to help you achieve your goal smoothly. The program offers an optimized preset for Sony Vegas (Vegas Pro 13 included). You can convert any video to Vegas edit-friendly format while keeping the original video quality. Here is review.
With it, you can convert any video files including MOV, MP4, VOB, AVI, MPG, MPEG, etc. to seamlessly fit Sony Vegas, Windows Movie Maker, Adobe Premiere Pro, Avid Media Composer and more. See below how to do the basic conversion task.
How to convert iPad Video to edit in Sony Vegas Pro 11/12/13
Free download the iPad Video to Sony Vegas Converter:
Other Download:
- Pavtube old official address: http://www.pavtube.cn/blu-ray-video-converter-ultimate/
- Cnet Download: http://download.cnet.com/Pavtube-Video-Converter-Ultimate/3000-2194_4-75938564.html
Step 1: Load iPad Video files.
Launch the MOV to Sony Vegas Converter, and you may either click "Add Video" button to import iPad .mov files, or directly drag and drop the files into this program.
Note:For Mac users, you can turn to iMedia Converter for Mac, You can convert iPad videos to Sony Vegas Pro 10/11/12/13 on Mac OS X El Capitan.

Step 2: Select Sony Vegas 11/12/13 compatible format
Get the dropdown menu of "Format" and then move your pointer to "Adobe Premiere Pro/Sony Vegas to choose "MPEG-2 (*.mpg) as the output format from the profile list which is the Sony Vegas Pro compatible video format.

Tip:You can adjust the video and audio parameters, including the Bitrate of Video & Audio, Video Size, Frame Rate, Audio Channels, etc., by clicking the Settings button on the main interface.
Step 3: Start conversion
Click "Convert" button to convert iPad video to Sony Vegas Pro friendly format, after the conversion is finished, you can access converted files by click "Open".
Youre done! Now you can easily open and edit iPad videos in Vegas Pro 13/12/11/10 without problems.
Read More:
Sony Vegas Pro makes it easy to import and edit movies, images and music for creating your next video or audio masterpiece. However, it will be a frustrating thing if you have problems of importing video files to Sony Vegas, especially the video files are the so common MP4 files. Many people love to use their iPad (iPad Pro, iPad Mini, iPad Air, iPad 4, etc.) to shoot videos. Before uploading to YouTube or posting them on Facebook, many people like to edit them. But, the audio doesnt import, the video is clunky and choppy. Have the same problems when importing iPad videos to Sony Vegas Pro 10/11/12/13 for editing?
Got some tech support online, I got know, iPad records .MOV videos in H.264 codec. While, Sony Vegas Pro is pretty picky with the codecs of what itll accept; it doesnt like H.264. To solve the issue, a common practical way is to convert iPad video to Sony Vegas most compatible video like MPEG-2. Follow this simple tutorial to find the reason and the solution to fix the problem.
To make iPad videos compatible with Sony Vegas Pro, here we need a workable video conversion program to convert iPad video files to Sony Vegas Pro edit-friendly formats. Pavtube Video Converter Ultimate is highly recommended to help you achieve your goal smoothly. The program offers an optimized preset for Sony Vegas (Vegas Pro 13 included). You can convert any video to Vegas edit-friendly format while keeping the original video quality. Here is review.
With it, you can convert any video files including MOV, MP4, VOB, AVI, MPG, MPEG, etc. to seamlessly fit Sony Vegas, Windows Movie Maker, Adobe Premiere Pro, Avid Media Composer and more. See below how to do the basic conversion task.
How to convert iPad Video to edit in Sony Vegas Pro 11/12/13
Free download the iPad Video to Sony Vegas Converter:
Other Download:
- Pavtube old official address: http://www.pavtube.cn/blu-ray-video-converter-ultimate/
- Cnet Download: http://download.cnet.com/Pavtube-Video-Converter-Ultimate/3000-2194_4-75938564.html
Step 1: Load iPad Video files.
Launch the MOV to Sony Vegas Converter, and you may either click "Add Video" button to import iPad .mov files, or directly drag and drop the files into this program.
Note:For Mac users, you can turn to iMedia Converter for Mac, You can convert iPad videos to Sony Vegas Pro 10/11/12/13 on Mac OS X El Capitan.
Step 2: Select Sony Vegas 11/12/13 compatible format
Get the dropdown menu of "Format" and then move your pointer to "Adobe Premiere Pro/Sony Vegas to choose "MPEG-2 (*.mpg) as the output format from the profile list which is the Sony Vegas Pro compatible video format.
Tip:You can adjust the video and audio parameters, including the Bitrate of Video & Audio, Video Size, Frame Rate, Audio Channels, etc., by clicking the Settings button on the main interface.
Step 3: Start conversion
Click "Convert" button to convert iPad video to Sony Vegas Pro friendly format, after the conversion is finished, you can access converted files by click "Open".
Youre done! Now you can easily open and edit iPad videos in Vegas Pro 13/12/11/10 without problems.
Read More:
- Editing Open Broadcaster Software(OBS) Files in Avid, Sony Vegas Pro
- Edit GoPro Hero 4K video in Sony Vegas
- Ingest Samsung NX1/NX500 H.265 to Premiere Pro CC for Editing
- Rip and Import DVD to Premiere Pro CS6
- PVR Solution - Convert PVR Files to MP4, AVI, MKV, WMV, etc
Go to link Download
Subscribe to:
Posts (Atom)