Friday, May 12, 2017
How to restore your iPhone iPad or iPod back to factory default settings if you have forgotten the passcode
How to restore your iPhone iPad or iPod back to factory default settings if you have forgotten the passcode
 |
| Pic-7(a) |
Now after you have installed the iTunes and open it first time it will show you the welcome screen as shown in the picture below.
 |
| Pic-7(b) |
iTunes is a media management software created by Apple, Inc., for both the Macintosh and Windows operating systems. You can use it to manage and play both audio and video files on your computer.You can take it anywhere which means all the contents like songs, your playlists, purchase and other stored items are available to you everywhere whenever and wherever you login onto iTunes using your Apple Id.
Someone else can log onto his iTunes account on your iPad if he signs out of your ID in the settings app first.The option can be found by selecting iTunes and App Store, then tapping on your ID. Any purchases downloaded on the device stay until they are deleted, but apps must be updated using the ID that originally downloaded them.And You can share purchases from both accounts on the same iPad with very little difficulty.
iTunes can also be used to restore and back up your settings, Messages, Camera Roll, documents, saved games, and other data loke Histories, cookies, bookmarks and much more. Backups dont contain content synced to the device, such as movies, music, podcasts, and apps.
If you choose to backup your iOS device on your PC it is saves the back up files at the following location, otherwise you can choose to save the back up at iCloud.
Mac: ~/Library/Application Support/MobileSync/Backup/
The "~" represents your Home folder. If you dont see Library in your home folder, hold Option and click the Go menu.
Windows XP: Documents and Settings(username)Application DataApple ComputerMobileSyncBackup
To quickly access the Application Data folder, click Start, and choose Run. Type %appdata% and click OK.
Windows Vista, Windows 7, and Windows 8: Users(username)AppDataRoamingApple ComputerMobileSyncBackup
To quickly access the AppData folder, click Start. In the search bar, type %appdata% and press Return.
Restoring your iPhone, iPad or iPod
Now depending on the condition of your phone you can go about this a number of ways. If your phone is functioning you can simply click "Settings" then go to "About" and click "Restore to Factory Defaults". If however the phone is not working it can be a little trickier. If you have forgotten the password and can not access the settings menu.Then you have to connect your iOS device to iTunes on your PC and restore it under recovery mode.
Method -1. Reset and Restore iPhone to Original Default Factory Settings with Recovery Mode
iPhone display freezing? iPhone doesn’t detect by or appear in iTunes? iPhone cannot sync with iTunes on PC or Mac? Cannot make or receive calls, send or receive text messages, or access email or the web? Or worse, iPhone simply won’t turn on and does not respond to tap or button press? If the problem still persists after you have reseted the iPhone, or tried various iPhone troubleshooting, it may be worthwhile to invoke recovery mode to restore iPhone to default factory settings, the original state as when you first received and unwrapped the phone.
Restoration of iPhone to original factory defaults will likely to fix all problem, with the downside that all data and information stored on your phone will be lost. Normally iTunes will make a backup automatically when you connect and sync the iPhone with the program, however, it’s still a good recommendation to copy out and backup everything that you may need on the phone before proceed to restore the iPhone.
To restore iPhone and reset the phone to default factory settings, follow these steps:
1. Turn off iPhone – Hold down the Sleep/Wake button for a few seconds until the red slider appears, then slide the red slider. Ignore this step if your iPhone is already off.
2. Press and hold down the Home button for about 10 seconds until a yellow triangle with a text which says Please Connect to iTunes appears.

- You cant update or restore because iTunes doesnt recognize your device or says its "in recovery mode".
- The Apple logo remains onscreen for several minutes with no progress bar.
- The Connect to iTunes screen appears.
- Turn off your device. If you cant turn it off, press and hold the Sleep/Wake and Home buttons at the same time and wait a few seconds for it to turn off.
- Plug the devices USB cable into your computer only.
- Hold down the devices Home button as you connect the USB cable to it.
- When you see the Connect to iTunes screen, release the Home button. If you dont see this screen, try steps 1 through 3 one more time.
 |
| Pic-7(c) |

 |
| Pic-7(d) |
 |
| Pic-7(e) |
5. Now as in the picture 7(e) above click OK and then Click Restore.Its now gonna ask you are sure you want to restore this iPhone to its factory default settings as shown in the pic-7(f) below, Click Restore and update.It will then start restoring the device which may take several minutes so make sure your computer has a power source connected to avoid unwanted power outage.
 |
| Pic-7(f) |
Additional Information
If you started your device in recovery mode by mistake, restart it to exit recovery mode. Or you can just wait-after 15 minutes the device will exit recovery mode by itself.
Method-3. Using DFU Mode in iPhone, iPad and iPod touch (Recovery)
In addition to recovery mode on iPhone, iPad and iPod touch, the iOS-based iDevices also has another mode which calls DFU. The main difference between the recovery mode and DFU mode is whether iBoot bootloader is loaded or bypassed during boot, with iBoot agent, when available, ensures that user cannot flash a firmware OS software which is lower or older version than the current one, effectively disable downgrade.
In recovery mode, which is the standard default way to upgrade or restore iDevices, iBoot is used when restoring or upgrade iPhone to make sure that the a iOS .ipsw which has the version number greater than or equal to current one is flashed or written to the device, or otherwise does not allow restoration process to proceed. In addition, unless the iPhone, iPad and iPod touch has been jailbroken or pwned”, custom-built firmware OS cannot be flashed. If the device is not connected to computer in recovery mode, the screen will display “Please connect to iTunes” logo.
DFU mode bypasses the loading of iBoot while still maintain the interfacing with iTunes, allow a older or lower version of iOS .ipsw to be flashed and restored to the device, including flashing a custom-build or home-made firmware iOS software. DFU mode is mostly used by hackers to downgrade or upgrade with a pre-jailbroken firmware created by PwnageTool. In DFU mode, the screen is totally black with no text display, just like when the phone is in power down state.
Here’s how to enter DFU Mode in iPhone, iPad and iPod touch:
1. Power on the iPhone, iPad or iPod touch if it’s in off state.
2. Connect the device to computer via USB cable or dock.
3. Run and open the iTunes program so that user will be notified when device enters DFU mode.
4. Press and hold Power or Sleep-Wake and Home buttons simultaneously for 10 seconds.
5. Release the Power or Sleep-Wake button and continue holding the Home button for 10 to 60 more seconds.
6. Wait until iTunes detects and recognizes the iDevice in DFU Recovery mode with notification message or system sound indicating hardware connect or disconnect.
 |
| Pic-7(g) |
Now you will see the message as shown below.

Alright So thats Enough to know about restoration..If you have any question or doubt please feel free to contact me at nasir@simulato.com.
In the next Post I am gonna write some interesting troubleshooting on Printers So Stay connected keep visiting.
Happy troubleshooting..
Best of Luck.!!!
Nasir
Go to link Download

Sunday, April 23, 2017
How to get the all opened tab back in Google Chrome if you have closed all the tab by mistake
How to get the all opened tab back in Google Chrome if you have closed all the tab by mistake
This is just for an information I am sure most of you must know it already.I wanted to let you know how you can get all the opened tab in Google Chrome back if you have closed all the tab by mistake, because when you manually close it, you dont get the option of restore so if you dont get the restore option here is how you can get all those opened tab back.
Get all opened pages that you were working on back
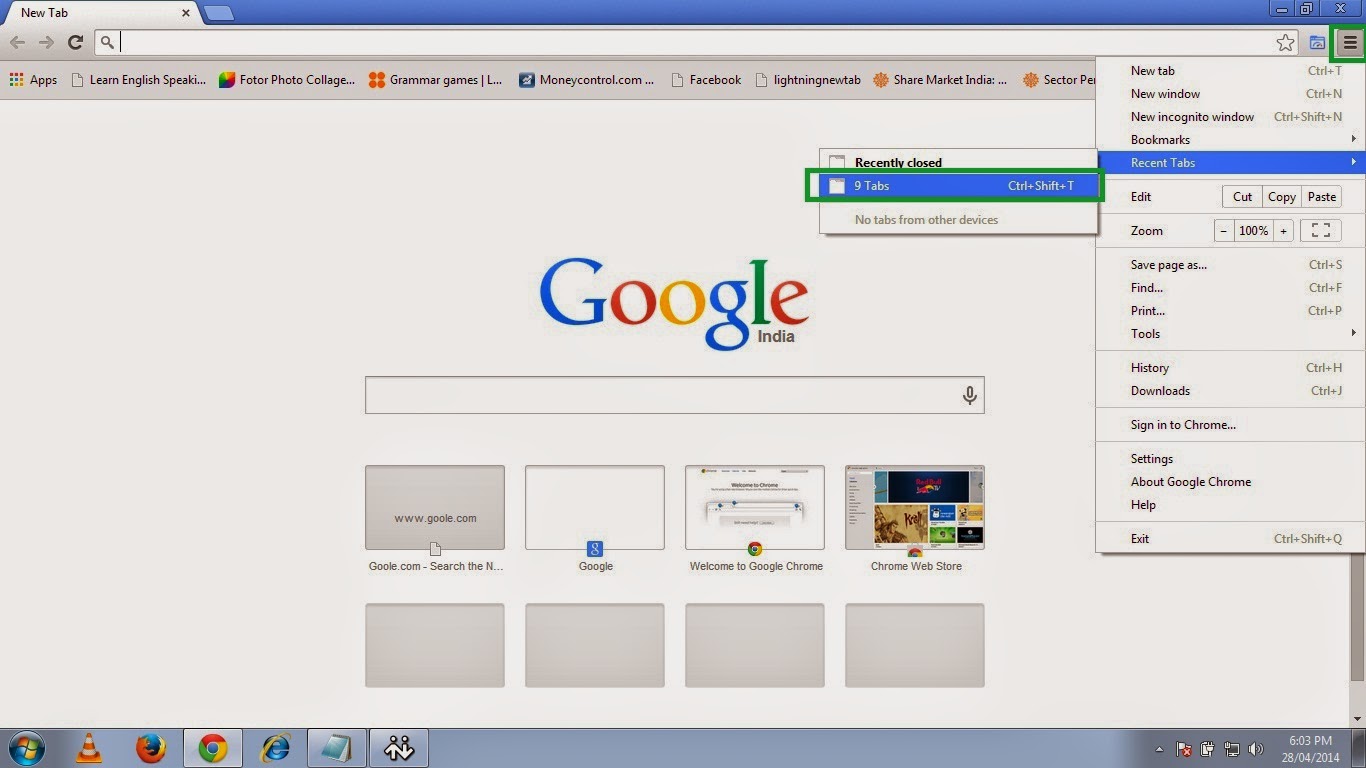
1. Open chrome and click on the three small parallel lines on the top right hand side and then move to Recent Tab and click the no. of Tab option so here in this picture it shows 9 Tab because I had 9 tabs opened before closing the Chrome.
So click on the 9 Tab.
OR
Just press Ctrl+Shift+T.
 |
| Pic-14(a) |
2. And then it will open all previously opened tabs with the webpages you were browsing.
 |
| Pic-14(b) |
Happy Learning
Nasir
People Also read my Following Posts.
Get a Website ups and running @ $2.95
What is a website and how is it accessed on the web?How to build and host it free?
How to Speed up your computer 20 Times faster.
Restore and Reset your iPhone, iPad or iPod back to the original Factory Default Settings.
Go to link Download
How to go Back Browsing History Using JavaScript
How to go Back Browsing History Using JavaScript
The history object models the browsing history of a window as a list of document and document states and the length property of the history object specifies the number of elements in the browsing history list.
The history object has back() and forward() methods that behave like the browsers back and forward buttons do, they make the browser go backward or forward one step in its browsing history.
history.back(); // Go back to the browsing history
history.forward(); //Go forward to the browsing history
Creating Buttons for History Back and Forward
You can create buttons to navigate browsing history back and forward using the following code.
<input type=button name="back" value="Go Back" onclick="history.back();">

<input type=button name="forward"
value="Go Forward"onclick="history.forward();">
Preview:
A third method, go(), takes an integer argument and can skip any number of pages forward or backward in the history list.
history.go(-2) //go back 2, like clicking the back button twice
Creating Buttons for History Back and Forward for Specific Page
You can create buttons to navigate browsing history two step back using the following code.
<input type=button name="backward2"
value="Go Back 2" onclick="history.go(-2);">
Preview:
Using history.go() method, if you want to go forward, can use positive arguments and if you want to go back, can use negative argument and the number used on the argument represents how many steps to go back or forward.
For example, if you want to go two step forward to the browsing history, can use history.go(2); and if you want to go three step backward to the browsing history, can use history.go(-3);
If a window contains child windows such as <iframe> elements, the browsing histories of the child windows are chronologically interleaved with the history of the main window. This means that calling history.back(); on the main window may cause one of the child windows to navigate back to a previously displayed document but leave the main window in its current state.
If a frame is contained within another frame that is contained within a top-level window, that frame can refer to the top-level window as parent. For parent window to navigate back to a previously displayed document you can use parent property as below.
parent.history.back();
I have described here some methods of navigating browsing history back and forward using JavaScript . If you know other more methods of navigating browsing history back and forward using JavaScript, you are welcomed to mention on the comment session at the bottom this post.
Related Search Terms
Browsing History Back Using JavaScript
Browsing History Forward Using JavaScript
Related Posts:
How to Write JavaScript Function as URL in Hyperlink?
How to use Round, Random, Min and Max in JavaScript
How to Concatenate, Join and Sort Array in JavaScript?
How to Loop Through JavaScript Array?
How to Loop using JavaScript?
How to Show Pop Up Boxes Using JavaScript?
How to Write Conditional Statements in JavaScript?
How to Write JavaScript With HTML?
How to create Changeable Date and Time Using JavaScript?
How to Validate a HTML Form Using JavaScript?
How to create a simple form using HTML?
How to Create JavaScript Image Sideshow with Links
How to Display Date Format in JavaScript?
How to Validate a HTML Form Using JavaScript?
What are the Different Ways to Redirect Page in JavaScript?
How to create Timer Using JavaScript?
How to make rounded corners border using CSS
How to Create Custom CSS Template for Printing
How to create a simple form using HTML?
Go to link Download
Saturday, March 18, 2017
How to get back formatted data and file from Transcend SD Card
How to get back formatted data and file from Transcend SD Card
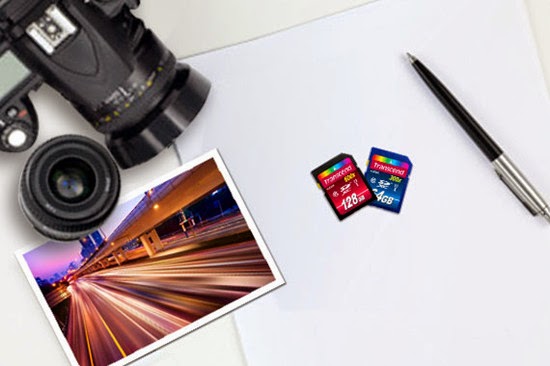
When you connect Transcend SD Card to computer, sometimes it asks you to format, and if you click ‘Yes’ then your data will be formatted. If this happens to you, here is the solution to get back formatted data and file from Transcend SD Card.
Why and How Data Recovery is Possible from a Formatted Transcend SD Card
Transcend SD card does not wipe the files completely even after you delete any picture file or format the memory card. It just removes the file name and their entries but the original data remain the same in the Transcend SD card. So the possibility of data recovery is very high after any type of deletion or formatting the SD card. You can download Transcend SD Card Recovery software which will search all the lost photos or other media files and recover deleted photos, videos, documents from formatted SD Card.
H-Data Recovery Master is an effective recovery tool, which helps you to recover lost or formatted file from Transcend SD card. Indeed, everyone feels so depressed when he or she lost the important photos. But now, with this recovery software, there is no need to be unhappy.
Here are my steps to get back formatted data from Transcend SD Card

Note: please stop using your phone/micro sd card once data get deleted. If you continue using the phone like saved new data to the sd after data deleted, then it is of high chance that some of the lost data may become corrupted.
Step 1: Connet your SD Card to Computer
Connect SD to computer via a card reader to hook up the computer, Then in Computer, check whether the smart phone shows as a drive letter (e.g. drive E: ).
Step2: Run H-Data Recovery Master on windows OS (Windows 8.1/8/7/Vista/XP...)

Step3: Scan deleted files or lost data on formatted crashed not recognized external hard drive
After you select the "USB disk/Card recovery", press "Next" to start scanning for recoverable photos, videos, and music files.
Step4: Select and recover lost hard disk data
After the program finish scanning all files, you can preview the files you wanted. Then mark the files you need. Click the “Recover” button to recover deleted data on htc one.

View more post
Retrieve tons of formatted pictures from 8GB Micro SD Card
With no recycle bin, is it possible to do Android deleted photo recovery
Formated Data Recovery – Recover Data from Memory Card, Disk Drive, USB, External Drive
Recover deleted files from Google Nexus 6 without a backup
Android 5.0 Lollipop Phone Data Recovery– Get Back All Deleted Files
High chance to recover files/formatted files from Memory Card
Go to link Download
Wednesday, March 1, 2017
Get back your deleted files on 16GB Google HTC Nexus 9 Tablet
Get back your deleted files on 16GB Google HTC Nexus 9 Tablet

For Google/HTC Nexus 9 users, it is common thing to capture photos and videos, download movies or save files in .doc, ppt, excel on Nexus 9. However, there are many reasons that you may delete or lost files on Nexus 9, once your files are lost after the system update; restore the Nexus 9 factory setting cause Nexus 9 data lost; lost important file due to formating the Nexus 9; Even if the Nexus 9 is crashed, smashed or broken, here are two ways for Google Nexus 9 users easily recover your files or file folders those lost or deleted from Nexus 9. Whats the way to recover Google/HTC Nexus 9 deleted file?
As we know, HTC Nexus 9 features a 8.9-inch IPS screen with 2048x1536 pixels resolution (4:3 aspect ratio), Mobile solutions include Plus, your favorite Google apps – Gmail, Google Drive, Docs, Sheets and Slides and more, Bluetooth 4.1 connectivity and 16 or 32GB of storage. The Nexus 9 is powered by a 64bit NVIDIA tegra K1 dual-core processor clocked at 2.3GHz and 2GB of DDR3 memory. To recover files deleted from Nexus 9,you need to use an effectively HTC Nexus 9 File Recovery-H-Data Recovery Master for Windows(Windows 8.1/Windows 8/Windows 7/Windows Vista/Windows XP supported).
This powerful and helpful HTC Nexus 9 Data Recovery can help HTC Nexus 9 users recover the lost and deleted photos/videos on Google Nexus 9. If you have mistakenly deleted other files like SMS, Contacts, Call History, DOC, XLS, and PPT etc. from Google Nexus 9 and want to get them back, it is the right software you are looking for. You can regard it as an all-in-one file recovery software to recover all types of deleted file from Google/HTC Nexus 9. Whats more,the Nexus 9 data recovery not only recover photos/videos form Nexus 9,but also supports restore photos/videos from other android phones like LG G Flex 2, Samsung Galaxy S6, Galaxy Note 4, etc, as well.
Steps to recover lost photos,video files from 16 GB HTC Nexus 9 Tablets
Step 1. Free Download HTC Nexus Photo Recovery

Step2. Connect Google/HTC Nexus 9 to Computer and Enable USB Debugging
Note: Once you deleted photos/videos/audios from Nexus 9 by mistake, stop using the phone to take any new photos or videos or save new files to it. Any new data written into the phone will overwrite the deleted photos and make them unrecoverable.
Connect your Google Nexus 9 to computer via USB cable or link your phones SD card to Windows with card reader.
Step 3. Scan Deleted Photos on Nexus 9
Launch the Photo Recovery, then click "files deleted accidentally" or "empted the recycle bin" to start scanning lost photos/videos/audios on Google Nexus 9.

Step 4. Preview and Recover Deleted Photos from Nexus 9
After scanning done, you are allowed to preview the scanned photos/videos/audios. Then select the photos or videos you need to recover and click on the "Recover" button to get them back.
View more posts
Recover lost/formatted photos pictures from HTC Nexus 9 32GB Tablet
Samsung Galaxy S6 Data Recovery – Recover Pics, Photos, videos
Not difficult to recover deleted data from Android cell phone
Step by Step to recover LG G Flex 2 Media Data with no backup
Is it possible to recover accidently deleted pictures from Nikon S8100
Restore Deleted Pictures, Videos, Files on Windows 8.1 Tablets
Go to link Download
Saturday, January 28, 2017
Get my deleted digital photos image files back from Narrative Clip 2
Get my deleted digital photos image files back from Narrative Clip 2

Digital cameras can be part of our life. Now people used to use digital cameras to record precious moments and amazing scenic. Thats why new cameras announced at CES showcase will attract broad attention. In the forthcoming CES2015, we can expect the best cameras, such as Nikon D5500, Panasonic Lumix TZ70, Canon PowerShot N2 and Narrative Clip 2 camera, the most wearable camera in the world. However, it seems digital pictures are easier to lose than paper film pictures.With the delete button , an operation mishap may delete one or all of the stored pictures in Narrative Clip camera card instantly. If you dont have a backup, you may permanently loss photos unless you have a digital photo recovery program.
If you want to have a Narrative Clip 2 or other new digital cameras, you may want to now:
Is it possible to get deleted digital photos file from camera card?

In most cases, there are some easy ways to restore accidentally erased photos. A digital camera stores the photo files as separate files on a flash memory card (also known as "digital film"). Memory cards are familiar by us as SD, CF, xD Picture Card, SmartMedia, Memory Stick, the MMC Card and more. Each card type has different brands like SanDisk, Kingston and more. Though different digital cards have different sizes, capacities and appearances, , they are just the same when acting as storage to save pictures, which kinds of your old floppy disk or hard drive does. When you delete one or more pictures file from your camera, your camera locates the picture files on the memory card, then "deletes" them and marks the leftover space as usable. In most cases, cameras, like Narrative Clip 2 doesnt delete the picture file body but leaves them as is, which makes it possible for us to retrieve them after accidentally deletion. Images and other types of files can be recovered or undeleted if the data hasnt been completely overwritten. However, the file will not be 100% recovered and perhaps some data has previously been overwritten or that specific area of the card/drive has bad sectors and is corrupt.There could be a chance that a recovered photo images might be not view-able after recovering.
Prepare to get your personal photo recovery solution? Lets get on with it.
Digital Camera Photo Recovery Reviews
1. H-Data Digital Photo Recovery ($34.95)
This is a professional photo files recovering program which can rescue deleted pictures even file system is damaged or memory card cant be accessible. The program can repair damaged photo files, such as BMP, JPEG, GIF, TIFF, Mamiya (MOS, MEF), Paint Shop Pro Image File (PSP), Picture File (PCT) and other 250+ file types. Which can help you regain deleted photos from Narrative Clip 2 or other cameras, formatted USB drive, corrupted hard drive with easy.
Now its free donwload from Softonic
2. Stellar Phoenix JPEG Repair 2 ($39)
Stellar Phoenix JPEG repair
Stellar Phoenix JPEG Repair claims to be able to repair corrupt or damaged JPEG/JPG files, even if the files are completely unreadable. It also offers to repair and save embedded thumbnails. This program is perhaps the most heavily advertised around the internet and you’ll see more about this online than most other photo repair programs. you can easily donwload from website.
3. Picture Doctor 2 ($99)
Picture Doctor
Users of PhotoShop might be interested in Picture Doctor because it lists PSD files and layers as being repairable in addition to JPEG files. Recovered files are saved as BMP files after the repair. What’s disappointing about Picture Doctor’s demo is the watermark covers most of the image so it’s hard to see if the fix has worked or not.
Narrative Clip 2 digital camera review
The Narrative Clip 2 comes with 8 GB of storage, but can also automatically upload photos and videos when connected to Wi-Fi to free space quickly.The new Clip 2 features a new 8-megapixel camera system with a range of 86°, along with a built-in Wi-Fi, GPS, and Bluetooth radios that allow for a user to access recent moments on the Narrative app for iOS. The camera also contains a new automatic photo capture feature that works with the Narrative Service to automatically sort photos into collections of moments for easy organization and access.
Go to link Download
Friday, January 13, 2017
How to Resolve add the desktop gadget back square face clock
How to Resolve add the desktop gadget back square face clock
add the desktop gadget back- square-face clock
original title: desktop gadget - square-face clock
I had a square-face clock installed because I can tell the deifference between the hour hand and the minute hand; on the round-face clock, the two are almost the same size.
I got rid of the installed clock because ny stand-alone desk clock started working
OK when I figured out how to set it,
But I now want the gadget clock back.
How do I make it re-appear? The standard control panel option does not conain the square-face clock.
Keys to the Problem add the desktop gadget back- square-face clock
Download Error Fixer for Free Now
There is no Yes/No.
If it is helpful press YES otherwise dont press anything.
Can you install the Round face clock?
If so, the square face clock is one of the options.
Select the wrench icon.
then press the small arrow to go to 7 of 8.
Boot in Safe Mode:
- Open Run command as previously described
- Type MSConfig
- Click on Boot tab
- Tick Safe boot in Boot option
- Select Network
- Click Apply and OK
- Reboot your system
Your system will boot in Safe mode with Networking. You may now try and open Windows Store and should not see any errors.
Another Safe way to Repair the Problem: add the desktop gadget back- square-face clock:


How to Fix add the desktop gadget back- square-face clock with SmartPCFixer?
1. Download SmartPCFixer. Install it on your computer.

2. After the scan is done, you can see the errors and problems need to be repaired. Click Fix All.

3. The Repair part is done, the speed of your computer will be much higher than before and the errors have been fixed. You can also use other functions in SmartPCFixer. Like dll downloading, junk file cleaning and print spooler error repair.

Related: How to Fix - 64g ssd with a 500g regular drive?,Allow Unhide Rows in Protected Workbook [Solved],[Solved] Get in Excel 2007 data from Access 2007 out of self-built Queries,[Solution] How can I temporarily disable service manager to install Adobe flashplayer?,[Anwsered] When I try to watch a flash video, I am told occasionally that I dont have Adobe Flash.,Solution to Error: Black screen during boot sequence,[Solved] Cant restore Windows 7 64-bit from external hard drive,How to Fix - IE 11 Enhance Protect Mode reset issue with add-ons?,Solution to Error: Internet Explorer 9 update/install error - Error Code 80092004,Upgrading to IE 8 causes cookies to get deleted when starting IE [Anwsered],Solution to Problem: All programs try to start from windows component
,Troubleshoot:External Hard Drive not listed in Windows 7 backup wizard Error
,How to Fix Error - Getting an error "not connected to the internet" while trying to install Samsung Kies?
,How to Fix - Internet Explorer shuts down and reopens tab when attaching to email or uploading files.?
,Fast Solution to Problem: Sending Error Message
,[Anwsered] Thinkpad 8611 Boot,How to Resolve - Svchost Helper?,Fast Solution to Problem: L30 101 Driver Windows 7,Troubleshooter of Error: Io Device,How to Fix Error - Dell Laptop Code 39?
Read More: Fast Solution to Problem: Adobe Flash Player is not running in IE10.,Troubleshooting:Adding an average line to a bar chart. Error,How to Resolve - After I use an Excel 2007 data list sheet for a mail merge, I get an error message when I try to open the list and can never open the spread sheet again?,Solution to Problem: After doing a Resistry Scan, noticed a file labeled CheckVer.ocx showing as a problem.,[Anwsered] Administrative View for scheduled Livemeetings?,a file called mDNSResponse.exe. is causing bonjour not to operate properly,what should I do?,A QUESTION USING THE "IFS" Formula.,A continuos flashing window with which title is C:WindowsSystem32cmd.exe, and has the following message: The syntax of the command is incorrect.,Acrobat compatibility issue and you tube problems____,ActiveX on IE 9 not loaded
Go to link Download
Saturday, December 31, 2016
How to get back pictures videos music from Huawei mobile phone
How to get back pictures videos music from Huawei mobile phone
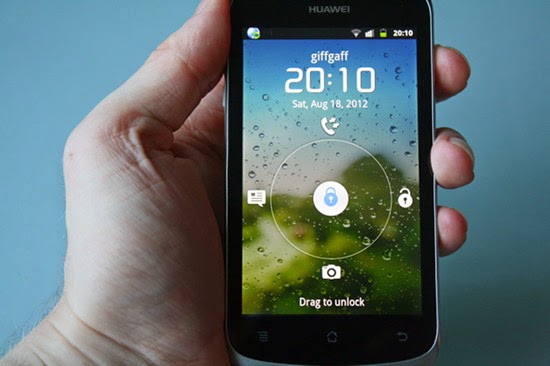
"Today I restored my Huawei mobile phone as I forgot the password. But I found that all the pictures, videos, music and other files are gone. How can I get them back? Can I get back on my phone because it contains some of my important data?"
Data loss is one of the common issues which most of people face these days. Some user feel it a very helpless situation when they lose their important files on their Huawei Android phones, like Huawei Ascend. How to restore your lost files from Huawei android phones? If delete something from your HUAWEI Android phone you can get it back by the use of Huawei Android Phone Data Recovery. This can recover deleted text messages, phone book numbers or contacts from the SIM card memory. You can also recovery data from your memory card through the same.
H-Data Android Recovery Software is one of the best Huawei Phone Data recovery tool in the world. You can use this Huawei file recovery to recover photos, SMS, contacts, videos, call logs, and other files from Huawei phones.The best thing about this software is that it doesn’t works on every mobile type and almost supports all windows version. It even offers user friendly interface that doesn’t need the technical guy to operate it.
By using it, you can recover your deleted text messages, photos, videos and other data from Huawei android devices with only a few clicks. download Huawei Android recovery software.
Steps to Recover Deleted Photos, SMS, Contacts, Videos from Huawei
Step 1: Connet your Android Phone to Computer
Connect android phone to computer. Then in Computer, check whether the smart phone shows as a drive letter (e.g. drive E: ).
Step2: Run H-Data android phone recovery program on windows OS (Windows 8.1/8/7/Vista/XP...)
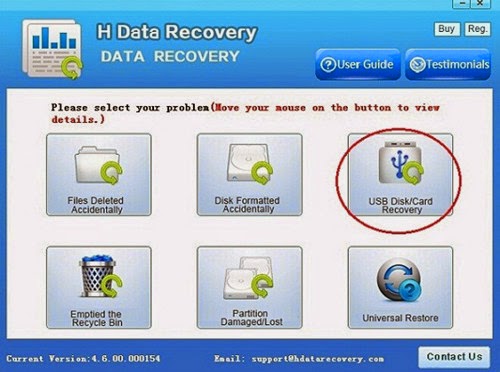
Step3: Scan deleted files or lost data on formatted crashed not recognized external hard drive
After you select the "USB disk/Card recovery", press "Next" to start scanning for recoverable photos, videos, and music files.
Step4: Select and recover lost hard disk data
After the program finish scanning all files, you can preview the files you wanted. Then mark the files you need. Click the “Recover” button to recover deleted data on htc one.
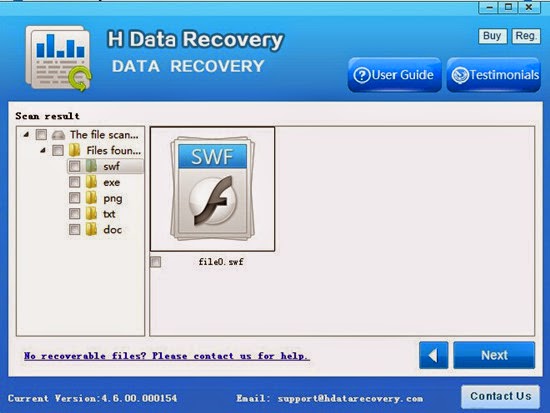
Besides Huawei phone, H-Data Android Data Recovery support varies kind of Android smart phone such as LG, Motorola, Samsung, HTC, etc.
View more post
Recover lost or deleted files from Android and Samsung Galaxy Phone
Galaxy S6 microSDXC Card Photo Recovery - Recover deleted picture files on Android
Is it easy to Recover Deleted / Formatted Android Deleted Photos
The way to recover deleted files from a freshly formatted sd card
Recovery accidentally lost 3 weeks of pictures from digital camera SD card
Go to link Download
Monday, December 12, 2016
Get data back
Get data back
Get data back
Data Recovery
The process of recovery points to recover deleted files. There is little room to work today, he does not need a computer, and the body stores the most important details of their business. So, if you can, offered to those who have lost important files, recover deleted files for a solution to Toronto.
There is a substantial likelihood that a computer hard disk is damaged or your computer is to meet with a virus that causes the loss of data. Currently, deleted a number of recovery tools, which collect the data.
To take into consideration deleted files from your computer to be an easy task for our team. In the event that there are many computer skills, you should contact us to recover lost data back. We have experienced engineers who can help. Is damaged in the event of hard disk physically, then this is the best place for you to find a solution to the problem. Make sure that certainly do not regret, if you have come to us for the best value for the effective recruitment of engineers.
Our experts can recover deleted files from hard disk failure data using the tools and skills data retrieval from any computer operating systems. The latest innovative hardware and software, including proprietary tools that we developed in the research and development department.
Our recovery process is classified as the various phases
Logical Data Recovery, the most destructive virus technology to recover deleted files and many other complex logic failures back to our experts. So if you suffer an accidental deletion, please visit our website and we will serve you better.
Physical Data Recovery: The failure of hardware, firmware, etc., can be treated effectively.
We are successful when we provide high quality and recovery of data, which may be regarded as incurable by other companies are. Our research department continues to grow new recovery strategies that the new hardware and IT requirements. The use of advanced technologies for high recovery of the data allows us to keep the top position as market leader in data recovery.
This will be completely dust-free atmosphere for recovery of deleted files from hard disk exposed. So, experts, this is an important improvement over the computer. Our prices reflect the sincerity of our society, and the model of direct communication.
Get data back
Go to link Download
Thursday, November 17, 2016
How to Add home back softKey on Screen
How to Add home back softKey on Screen


Time to add home/back soft button keys on Android touchscreen without rooting your device. You dont need to change your android smartphone for doing so, we are going to share an easy method that will help you add Home/Back soft button on your Android without root.In many android devices you must have seen the three soft touch keys at the bottom of a touch screen which are similarly used as in buttons in another android.
Actually, those soft keys are better than the harder one, but these soft keys arenot available in every android handset. However, you dont need to change your device for that, there is a way by which you can also add that three keys on your android screen.
Mostly this is implemented after rooting your android, but that voids your device warranty. So we have a way by which you can add these buttons without rooting your android. So have a look on complete guide discussed below to proceed.How to Add Home/Back Soft Button Keys on Android without RootThe method that we are going to discuss right here is very simple and will work with a cool android app that will let you to add these three buttons on your android bottom touch screen thatmakes your user interface experience more flexible and reliable as hard buttons can get stop working but these will not. So follow up the steps below.Steps To Add Home/Back Soft Button Keys In Your Android
Step 1. First of all, you need to download and install the cool android app that is Back Button .Download from play store
Step 2. Now after installing in your device launch it and you will see a popup appears asking you to enable the app in accessibility permission. Grant the permission.
Step 3. Once, you granted the permission, you can see the app. There you need to swipe to a right at the "Active" button to enable this app on your device.
Step 4. Now after this come back to the back button app and there you need to activate the active option and then activate the buttons that you want to be there in your android touch screen. Now you will instantly see these buttons on your screenYou can easily re-position these button by simply tapping on them, also you can resize them and customize them completely according to your wish.Thats it! you are done, for those that their buttonsare still working, now you have extra three buttons on your android touch screen that will work exactly same as you three hard buttons do.
So above is all about How to Add Home/Back Soft Button Keys on Android without Root. With this method, you will be having three touch buttons without rooting your device. Hope you like the post, do share with others too, Leave a comment below if you have any related queries with this.
Kelvin Alexander y
Go to link Download
Sunday, November 13, 2016
Guest Post Websites Using a Back Door Technique to Find Visitors Real IP Locations
Guest Post Websites Using a Back Door Technique to Find Visitors Real IP Locations
Websites Using a "Back Door" Technique to Find Visitors Real IP Locations
 |
More VPN users are becoming aware that some websites are using a fairly new technology implemented in browsers like Google Chrome and Firefox, allowing websites to see the real IP and location of their users, regardless if the user is behind a VPN or proxy, essentially bypassing its protection.
This back door technique is called WebRTC and is supported in Chrome, Firefox, and Opera browsers. Only Firefox has an official method to disable WebRTC for users who wish to keep their real IP private behind their VPN, by visiting in the Firefox URL bar "about:config" then change the "media.peerconnection.enabled" setting to "False" will turn off WebRTC in Firefox. Chrome and Opera users are not so lucky, as there is no official method to disable WebRTC, they must rely on unofficial third party browser plugins which dont always work.
Some websites use the WebRTC back door to display content to their visitors only from specific geographic locations - different content for different locations. This may pose an inconvenience for users who travel often: visitors will have problems accessing content from their home location and instead only have access to content from the region they are currently traveling within, even when using a VPN to set their IP location or not.
How does this WebRTC back door really work? When a visitor opens a website with WebRTC code, it instructs the users web browser to make direct DNS calls to another server of the websites choosing. These DNS calls bypass typical VPN connections. Not just web browsers and websites can do this, any application running on your device can use the same technique to bypass your VPN or proxy.
The best solution to prevent your real IP leaking for both websites and apps is to change your device system DNS IP that works as a smart DNS proxy, such as Hide My IPs DNS Proxy service. Free DNS IPs such as Google DNS or OpenDNS do not offer protection for WebRTC back doors or other methods that "leak" users real IP addresses.
Perhaps one day Google Chrome will officially allow users turn off WebRTC, but this remains to be seen.


Hide your iP visit =======> https://www.hide-my-ip.com/
Go to link Download