Friday, October 28, 2016
How To Create Bootable USB Pen drive For Windows 7
How To Create Bootable USB Pen drive For Windows 7
You know how you can install an OS easily by using a bootable DVD or CD. Now in this tutorial, we will discuss how to create a bootable USB pendrive to install an OS from your pendrive.
Also read: How To Install Windows XP From USB Flash Drive

Tools required:
- Windows 7 installation disk
- A USB pendrive. Minimum recommended size is 4 GB.
Steps To Create A Bootable Pendrive
Step 1:
Open your PCs PowerShell or Command Promt with administrative rights.
Open your PCs PowerShell or Command Promt with administrative rights.
Step 2:
After inserting your USB pendrive, run DISKPART from the PowerShell.
After inserting your USB pendrive, run DISKPART from the PowerShell.
Step 3:
Type the command LIST DISK. The result will be as shown below:
Type the command LIST DISK. The result will be as shown below:

Here DISK 0 is the hard disk and DISK 1 is the pendrive I have used.
Step 4:
In my case, the USB drive is DISK 1. So in this step, I enter the following command:
SELECT DISK 1. According to your disk number, the "1" in the command will change.

Step 5:
After the USB drive is selected from DISKPART, enter the following commands one by one:
CLEAN
CREATE PARTITION PRIMARY
SELECT PARTITION 1
ACTIVE
FORMAT FS=NTFS QUICK
ASSIGN
And at last, enter EXIT command

Step 6:
Exit PowerShell and insert your Windows 7 installation disk. Now open My Computer.

Note the drive letters of both - Your pendrive and Windows 7 installation disk. In my case, they are G: and H: respectively.
Step 7:
Again start PowerShell and enter following commands one by one:
H:
CD BOOT
BOOTSECT.EXE /NT60 G:
Note the drive letters I used here are H: and G: according to my drives and these letters may be different for you.
Now your pendride has become a bootable one.
The last step is to copy all the contents of your Windows 7 installation disk to your pendrive. So open My Computer > Windows 7 installation CD and copy all the contents there and paste it in the USB drive you have used in this process.
Now your pendrive is ready to boot and you can install Windows 7 from that USB pendrive. You can also follow the same procedure with any other OS installation disk to create a bootable pendrive for that OS.
Hope you liked the tutorial! Do comment and let me know if you face any problems or if this tutorial proved helpful to you...
Go to link Download

how to fix Weather gadget could not connect to service
how to fix Weather gadget could not connect to service
Issue: Windows Vista and Windows 7 sometimes have problem with Windows Live Gadget as it does not work and gives error message- " Could not connect to Service". When the weather gadget stops working the currency gadget also does not work.
As per the Microsofts support website weather gadget may not work if the following conditions are true:
When the Weather Gadget stops working or having some issue it will show an exclamation mark next to it and also shows message "Cannot connect to service".
And when you see error message Weather gadget cannot connect to service, you might wanna check after changing the location to see its weather.So you would click on the settings button on weather gadget and then type the name of the location.But if you try to change the location when weather gadget stops working you would get error message "Location not found".
In order to fix Weather Gadget I did a lots of research and found different misleading solution which actually does not fix this issue rather waste your time but just to let you know I am first mentioning what all I have found as claiming problem solved using these steps.Please make a note that none of these ever worked.As per the Microsofts support website weather gadget may not work if the following conditions are true:
- System Restore was performed.
- User Account Control (UAC) is turned on.
- The scannow command finds missing or corrupted system files.
When the Weather Gadget stops working or having some issue it will show an exclamation mark next to it and also shows message "Cannot connect to service".
 |
| Weather Gadget stops working |
And when you see error message Weather gadget cannot connect to service, you might wanna check after changing the location to see its weather.So you would click on the settings button on weather gadget and then type the name of the location.But if you try to change the location when weather gadget stops working you would get error message "Location not found".
 |
| Weather gadget stops working |
How to fix Weather gadget stops working issue?
1. Start - type in Search box - COMMAND find at top of list- RIGHT CLICK - RUN AS ADMIN
sfc /scannow
2. Click on start and type regedit
Go to HKEY_LOCAL_MACHINESOFTWAREMicrosoftWindowsCurrentVersionSidebarSettings
On the right window create A New DWORD(32 Bit Value) with name “AllowElevatedProcess”
and set value as “1”.
Close Registry Editor
Restart
3. Start the command prompt by choosing run as administrator and type the following command lines.
cd "%programfiles%Windows Sidebar"
regsvr.exe wlsrvc.dll
4. Try to re-register concerned dll files of Windows gadget when gadget stops working.
(a).Go to Start and under search type in CMD then Right Click on it and click on Run as administrator.
(b). Then type these 3 commands one by one and hit Enter:
regsvr32 msxml3.dll
regsvr32 scrrun.dll
regsvr32 jscript.dll
(c). Then reboot your Windows PC and test it.
Tried all the above mentioned steps.It never helped me.Weather gadget still does not work and shows can not connect to service.One of the solutions suggested to rather download another similar apps named Pro Weather Gadget from the following location.
ProWeather Gadget -
http://gallery.live.com/liveItemDetail.aspx?li=b14d68bb-71ee-40cd-8cf5-c95b63503d00bt=1pl=1
But let me tell you just one simple way that worked instantly and fixed the problems.
First Method.
Step 1. Go to "C:UsersUSERNAMEAppDataLocalMicrosoftWindows LiveServicesCache", open "Config.xml" (Right Mouse Click -> Edit) and save it (File -> Save) without doing any changes. After 10-20 seconds restart the gadget!
Second Method
A) Copy the following files and folder from a Windows 7 machine with a working stock weather gadget to a flash drive or network file share:
1. %localappdata%affected userlocalmicrosoftwindowswindows liveservicescacheconfig.xml (just copy the file)
2. %localappdata%affected userlocalmicrosoftwindowswindows sidebarcache168522d5-1082-4df2-b2f6-9185c31f9472 (copy entire folder which should contain one or more xml files)
3. %localappdata%affected userlocalmicrosoftwindowswindows sidebarsettings.ini (just copy the file)
B) Paste (OVERWRITE if ask) the copied folder and files into the same locations on the machine whose stock weather gadget is not working.
C) Drag the weather gadget back out and this time it should be working.
 |
| Weather Gadget |
Third Method
Sometime you might receive an error message “Desktop gadget are managed by your system administrator.”
Open a Notepad then copy-paste the following text:
Windows Registry Editor Version 5.00
[HKEY_CURRENT_USERSoftwareMicrosoftWindowsCurrentVersionPoliciesWindowsSidebar]
“TurnOffSidebar”=-
[HKEY_LOCAL_MACHINESOFTWAREMicrosoftWindowsCurrentVersionPoliciesWindowsSidebar]
“TurnOffSidebar”=-
Save it as Gadget_fix.reg. Run this File and reboot your Windows computer.
Note: Some of the website says weather gadget has been discontinued by microsoft and thats why weather gadget stops working.There is no such information and that is not correct.Microsoft told the user not to use the gadget as it makes your computer vulnerable.
Microsoft Says Windows Sidebar platform in Windows 7 and Windows Vista has serious vulnerabilities. Microsoft has retired the feature in newer releases of Windows. Gadgets could be exploited to harm your computer, access your computers files, show you objectionable content, or change their behavior at any time. An attacker could even use a gadget to take complete control of your PC.
If any of the gadgets intermittently does not start in windows 7 try this hotfix from microsoft described on page http://support.microsoft.com/kb/979164.
People also read following top most searched issue
Best Google Search Tips and Tricks
How to start Installer,Print spooler,windows Audio or any other services in safe mode
Read how to fix black screen with only mouse cursor issue- Explorer.exe does not start automatically
Get a Website ups and running @ $2.95
Fix USB 3.0 External Hard drive installation issue ( Not detecting in Windows )
What is a website and how is it accessed on the web?How to build and host it free?
Go to link Download
How to block advertisement using OpenWRT
How to block advertisement using OpenWRT
Blacklist Ad Content Delivery Domains
This is how I block advertisement at DNS level on OpenWRT.Blocking at DNS level is advisable because it does not impact bandwidth and latency.
Simply said it tricks your computer that your loopback address is where adserver are located but cannot be found so adservers are ignored totally.
AdServers are becoming more and more of a nuisance.
- They serve up malware advertisement,
- They load flash advertisements which waste bandwidth and increase latency.
- They run javascripts to try and "take over" your web browser via redirection and popups.
Fortunately OpenWRT makes this easy with the use of dnsmasq.
My web surfing experience has since greatly improved since
Here is how to do it in 2 steps(Yes it is that simple and powerful with Linux):
- SSH into your router
- Copy and paste this Command into the terminal
wget -O /etc/dnsmasq.conf "http://pgl.yoyo.org/as/serverlist.php?hostformat=dnsmasq&showintro=1&startdate[day]=&startdate[month]=&startdate[year]=&mimetype=plaintext" && /etc/init.d/dnsmasq restarthttp://pgl.yoyo.org/adservers/ to get a list of known adservers in a dnsmasq friendly format and save it to /etc/dnsmasq.conf if that command is successful then restart dnsmasq.After that you will soon notice the disappearance of many irritating advertisement when using the web .
Hopefully this improves your web surfing experience as well as let you realise and embrace the power of shell scripting.
If you want to point the ip address to 0.0.0.0 (invalid ip) instead of 127.0.0.1(loopback)
sed -e s/127.0.0.1/0.0.0.0/g -i /etc/dnsmasq.conf && /etc/init.d/dnsmasq restartBlacklist Malware Delivery Domains
Copy the ads list to temporary directorycp /etc/dnsmasq.conf /tmp/adlist.txt cd /tmp/ wget http://mirror1.malwaredomains.com/files/domains.txt awk { print $1 } domains.txt | grep . | sed s/^/address=//g | sed s/$//0.0.0.0/g > malwarelist.txt sed -i -e $a adlist.txt && cat adlist.txt malwarelist.txt > combinelist.txtsort combinelist.txt > dnsmasq.conf mv dnsmasq.conf /etc/dnsmasq.conf && /etc/init.d/dnsmasq restart && rm *.txtUnblock a particular domain
Assuming there is this domain "example.com" that falls into the blacklist but you know you need it, so how do you unblock it? This example uses vi but you can use any text editor, the idea is the same remove the line and it will be unblocked.Edit the file using the text editor vi
vi /etc/dnsmasq.confSearch the file for the block domain
type
"/example.com"Delete the line navigate to the line using arrow then
type
"dd"The line should dissppear
Press escape to return to command mode then
type
:wqto save and quit
Restart the DNS Service
/etc/init.d/dnsmasq restartReload the browser with Ctrl + F5 and the domain should be unblocked.
Go to link Download
Thursday, October 27, 2016
How to Recover Data Contacts from Samsung S7 Edge
How to Recover Data Contacts from Samsung S7 Edge
Samsung Galaxy S7 Giggest Feature?
Samsung official video exposure S7 supports wireless charging and waterproof
[Abstract] Galaxy S7 designs with last years Galaxy S6 and Galaxy S6 Edge is very similar to support wireless charging, with a waterproof function.


How to Recover Lost Photos from Samsung Galaxy J1
Android 6.0 Update- Recover Samsung Photos, Videos, SMS
Galaxy S7 designs with last years Galaxy S6 and Galaxy S6 Edge are very similar, the same side of the curved screen design. Although the video is not clear that the Galaxy S7, but Dellie Threesyadinda use the phone in the rain episode proved this new machine will support the waterproofing properties. And also appeared in the video wireless charging base.
In the video, the athletes in the rain through the use of water emphasized the characteristics of Galaxy S7, and the lock icon and privacy features appear stressed the additional security features of the new flagship brings. Finally, the video also highlights the new product in the shooting function will greatly enhance night.
The Method to Recover Lost or Deleted Data Contacts from Samsung Galaxy S7 (Edge):
Do you lost any important data or contacts from your Samsung Galaxy S7 or Galaxy S7 edge? No matter how you cause you Samsung Galaxy data lost, lots of friends dont know how to get back those lost contacts, text messages, videos, notes, apps, photos, calendar and more from your new Samsung Galaxy S7 (Edge), and they have searched out so many methods with recovery tool, but nothing is work well.
Here, we recommend you the best and safely Samsung Data Recovery software tool, Samsung Data Recovery, which is capable of recovering pictures, messages, contacts, video, audio and documents from/on an Samsung phone or tablet. With several simple clicks, your lost files will come back at ease.
Note: Make sure your device can be switched on and recognized by your PC, and the battery should be more than 20%, thus you can perform a successful recovery.
Download the program for free and have a try:
Simple Steps for you to Restore lost Data Contacts from Samsung S7 (Edge):
Step 1. Connect your Samsung Galaxy S7 or S7 Edge to the computer
First of all, download, install and run the Samsung Data Recovery program on your computer. Then use a USB cable to connect your phone to the computer. This article takes Samsung as an example.
Step 2. Enable USB Debugging of your Samsung
After that, the program will remind you to enter the USB debugging. If you have already enabled USB debugging of your Samsung, you can skip it and move to next step. Different operating system will have different setting procedure.
Enter "Settings" and choose "Developer options". After that, please tick "USB debugging".
Step 3. Scan Lost Data Contacts from your Samsung Galaxy S7 (Edge)
After you click "Start" button, you can move on your phone and click "Allow" button to analyze your Samsung S7 or S7 Edge. Then Move to your desktop to click "Start" again. Then Samsung Data Recovery will begin scanning your Samsung for your lost data.
Step 4. Preview and Restore deleted data Contacts from Samsung S7 (Edge)
After the scan, you will have your Samsung files scanned out and listed in categories on the interface. Now, you can click "Contacts" on the left category to preview them one by one. You just need to mark the contacts you want and click "Recover" button.
More info:
How to Recover Lost Photos from Samsung Galaxy J1
Android 6.0 Update- Recover Samsung Photos, Videos, SMS
Recover Data after Factory Reset LG/HTC/Sony/ZTE/Huawei/Samsung
How to Recover Data from Android after Factory Reset?
How to recover deleted SMS from Samsung
Go to link Download
How Can I Fix All programs and files in desktop and start panel into ink format
How Can I Fix All programs and files in desktop and start panel into ink format
All programs and files in desktop and start panel into ink format.
HI,
My computers all programs and files in desktop and start panel into ink format.What I do?
Please advice me.
Anwsers to the Problem All programs and files in desktop and start panel into ink format.
Download SmartPCFixer for Free Now
Tweak IE Options- Open Internet Explorer.
- Go to "Tools > Internet Options > Advanced Tab".
- Uncheck "Enable third-party browser extensions".
- Click "Apply".
- Reboot your computer.
Another Safe way to Fix the Problem: All programs and files in desktop and start panel into ink format.:


How to Fix All programs and files in desktop and start panel into ink format. with SmartPCFixer?
1. Download Error Fixer . Install it on your system. Click Scan, and it will perform a scan for your computer. The errors will be shown in the list.

2. After the scan is finished, you can see the errors and problems need to be fixed. Click Fix All.

3. The Fixing part is done, the speed of your computer will be much higher than before and the errors have been removed.

Related: error message fsui.exe/ wlidcli.dll is missing
,Solution to Error: Excel: Automatic number generation
,Troubleshoot:i wanna change language of all windows in Windows 7 Home Premium
,Troubleshooting:IF Function, if the vendor ID in column A matches any of the vendor IDs in column F, I want 1099 to appear in column D. Error
,Fast Solution to Problem: ReadyBoost is not working properly in my computer
,Troubleshoot:Error: "0x81000032 make sure the C: drive is online and set to NTFS" when trying to backup to external hard drive. Error,External Hard Drive not listed in Windows 7 backup wizard Tech Support,Tech Support: Im always being signed off so annoying,Solution to Problem: Impossible to use Internet Explorer! I keep getting the same error message every time i try to use IE.,Referencing data in Access using Excel [Anwsered],Need Best Way To Present Data [Anwsered],Same question but for windows 7 home edition,sometimes fullscreen wont activate [Solved],Solution to Error: We bought a new computer with windows 7 and it is constantly freezing. How do we fix this?,Solution to Error: Windows 8 update crash (2013-07-22),brclr.dll.mu_ Missing Error Fixer,How To Resolve Missing fin_myagtui.eng Problem,Corrupted f_0006ad File - How to Fix,nkebigvg.cpl Not Found Error Fixer,Corrupted olcontrols.ocx File - How to Fix
Read More: Fast Solution to Problem: All Removable media drive are missing from Windows Explorer,[Solution] appcrash explorer.exe 6.0.6001.18164,How Can You Fix - All programs hang when attempting to print?,[Anwsered] All the AVG anti-virus download failed, the message was there is virus and were deleted.,How to Resolve - Applications stop working and cannot use Task Manager?,After Windows Update CD/DVD drive does not work,After installing windows 7 to laptop the labels print out of line how can I fix it,After my computer sleeps the wireless always disconnects and will no reconnect,After signing into Pogo.com, I get a message" This tab has been recovered"....what does this mean and how do I fix it.....,All desktop icons changed to windows live and does not open
Go to link Download
How to Enable “Group Policy Editor” gpedit msc in Windows 7 Home Premium Home Basic and Starter Editions
How to Enable “Group Policy Editor” gpedit msc in Windows 7 Home Premium Home Basic and Starter Editions
BEST GREENHOUSES FOR GROOVING VEGETABLES
? ? 1(360)241-1624 ?

? ? 1(360)241-1624 ?
DURABLE! AFFORDABLE! ALUMINUM + UV POLYCARBONATE
DISCLAIMER: This utility has been shared for the sake of knowledge sharing. Patching system files using 3rd party software might be dangerous for your system. We do not recommend it and well not be responsible if it harms your system.Many times we post tutorials which require Group Policy Editor (gpedit.msc). But some Windows 7 editions (Home Premium, Home Basic and Starter) dont come with Group Policy Editor. Only Windows 7 Professional, Enterprise and Ultimate editions come with Group Policy Editor installed.
Today we are going to share a simple installer which installs the required system files in Windows so that you can enjoy Group Policy Editor in all Windows 7 editions.
"jwils876" @ DA has shared a small setup file to enable Group Policy Editor in Windows 7 Starter, Home Basic and Home Premium editions.
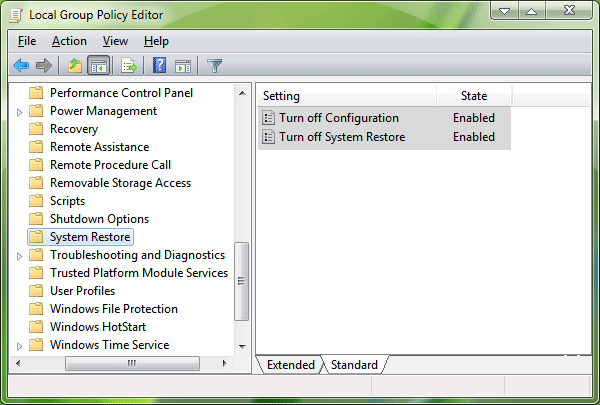
The installer has been originally created by "davehc" @ Windows7forums, so thanks goes to him as well.
First download the setup file using following link: Download Group Policy Editor Installer
Youll find the download link in right-side section of the above mentioned page. After downloading the ZIP file, extract it using WinRAR or Zip. Run the extracted setup.exe file. Itll install the files and youll be able to access gpedit.msc command via RUN or Start Menu search box.
NOTE 1: For Windows 7 64-bit (x64) users! Youll also need to go to "SysWOW64" folder present in "C:Windows" folder and copy "GroupPolicy", "GroupPolicyUsers" folders and gpedit.msc file from there and paste them in "C:WindowsSystem32" folder.
NOTE 2: If you are getting "MMC could not create the snap-in" error message while running gpedit.msc, check out following steps to fix the problem. Basically it happens when your username in Windows contains more than one word.
1. Run the installer and leave it at the last step (do not click on the "Finish" button).
2. Now go to C:WindowsTempgpedit folder.
3. If you are running 32-bit (x86) edition of Windows 7, right-click on x86.bat file and choose "Open With -> Notepad" option. If you are running 64-bit (x64) edition of Windows 7, right-click on x64.bat file and choose "Open With -> Notepad" option.
4. Youll find a total of 6 lines containing the following string in the file:
%username%:f
5. Edit those lines and replace %username%:f with "%username%":f
For example:
Original: icacls %WinDir%SysWOW64gpedit.dll /grant:r %username%:fNew: icacls %WinDir%SysWOW64gpedit.dll /grant:r "%username%":f
6. Save and run the file (right-click -> Run as Administrator).
7. Thats it. Youll have working gpedit.msc.
Thanks "askvg" for the fix...
Durable Greenhouses made from Polycarbonate UV Protected material and Aluminum

ALSO PLEASE VISIT THIS VIDEOS AND SEE IF YOU FIND SOMETHING NEED:
Windows Registry Tools can be downloaded here:
How to kip your PC Private by deleting DATA Permanently
http://askpctech.blogspot.com/2016/03/kip-your-pc-privat.html
This tutorial is made up on request several users, is well is fallowing video:
1)How to Delete Paint Recent Pictures from List in Windows 7
2)Win 7– Fix for “Safely Remove Hardware and Eject Media” not working How To
3)Windows 10 How to Fix Black Screen After Booting
4)How To Remove Windows 10 Upgrade Notification On Windows 7 And Windows 8
5)How to Delete Face book Page Permanently - 2015
6)How to Uninstall Windows 10 and Downgrade to Windows 7 or 8.1
7)detected: not-a-virus:remoteadmin.win32
8)How to change pictures into icons for folders
9)Speed up your PC Disable System Restore on SSD
10)Speed up your PC Disable Scheduled De-fragmentation SSD
11)2015 Black screen of DEATH Windows 7 & 8 - with cursor at start-up SOLVED
12)Upon start up only wallpaper shows FIX
13)Here is video on Windows 7 & 8 - Black screen with cursor at start-up FIX
You can also open Task Manager by pressing Ctrl+Shift+Esc.
14) I bought a windows 7 PC but it Look alike old PC FIX:
15) Windows 7 & 8 - Black screen with cursor at start-up FIX:
16) How To Fix Minecraft OpenGL Error Windows 7 xp vista 720p :
17) removing bars using regscanner regedit & file shredder 720p:
18) How to Recover windows Explorer from error 2014 720p
19) HOW TO Save on battery online
20) Windows 7 & 8 - Black screen with cursor at start-up FIX
Upon start up only wallpaper shows no icons
CTL+ALT+DEL then click file and new task. then type explorer.exe and press ok
Best Greenhouse system 2015
Go to link Download
Free hard drive recovery
Free hard drive recovery
Free hard drive recovery
Saving Grace for your files-Free Hard Disk Recovery
If the computer long enough, you can be filled with your most important files. It may have been used as a storage place for your most precious pictures, videos and music. You can also store all your important files required in your career. You have the computer for a long time, so you are sure not to go to the accident. If not, then hopefully, the files are stored. But if it does not crash, it was too late. Fortunately, there are sites that offer free hard drive recovery.
Stellar Phoenix NTFS Data Recovery 4.0 for Windows is one of those applications. This free software allows the recovery disk to recover corrupted documents and images. It is also possible to perform an advanced search to find the data. For people who have an accident while trying to upload their own images from your digital camera or camera phone, this application is perfect for you. You can restore the damaged content in seconds.
Data Recovery Tool 2.0 is another application of high performance. This software is free hard drive recovery is very effective and results-oriented. It can successfully recover the contents of damaged storage media including hard drives, USB drives, zip drives, USB drives, digital media and more. The software is designed to recover a deleted partition and the data from your hard drive inaccessible, can be Windows 98, ME, XP, 2000, 2003 and Vista. These two applications will be the saving grace for your files. Retrieve your most important day.
Justin is a financial writer from around the web on the stock with the forex. If you are interested in things like the recovery of free hard drive space and direct access trading, then you see on the Internet and youre sure to find some great information.
Free hard drive recovery
If the computer long enough, you can be filled with your most important files. It may have been used as a storage place for your most precious pictures, videos and music. You can also store all your important files required in your career. You have the computer for a long time, so you are sure not to go to the accident. If not, then hopefully, the files are stored. But if it does not crash, it was too late. Fortunately, there are sites that offer free hard drive recovery.
Stellar Phoenix NTFS Data Recovery 4.0 for Windows is one of those applications. This free software allows the recovery disk to recover corrupted documents and images. It is also possible to perform an advanced search to find the data. For people who have an accident while trying to upload their own images from your digital camera or camera phone, this application is perfect for you. You can restore the damaged content in seconds.
Data Recovery Tool 2.0 is another application of high performance. This software is free hard drive recovery is very effective and results-oriented. It can successfully recover the contents of damaged storage media including hard drives, USB drives, zip drives, USB drives, digital media and more. The software is designed to recover a deleted partition and the data from your hard drive inaccessible, can be Windows 98, ME, XP, 2000, 2003 and Vista. These two applications will be the saving grace for your files. Retrieve your most important day.
Justin is a financial writer from around the web on the stock with the forex. If you are interested in things like the recovery of free hard drive space and direct access trading, then you see on the Internet and youre sure to find some great information.
Free hard drive recovery
Go to link Download
Subscribe to:
Posts (Atom)